
Why did my farm table split?
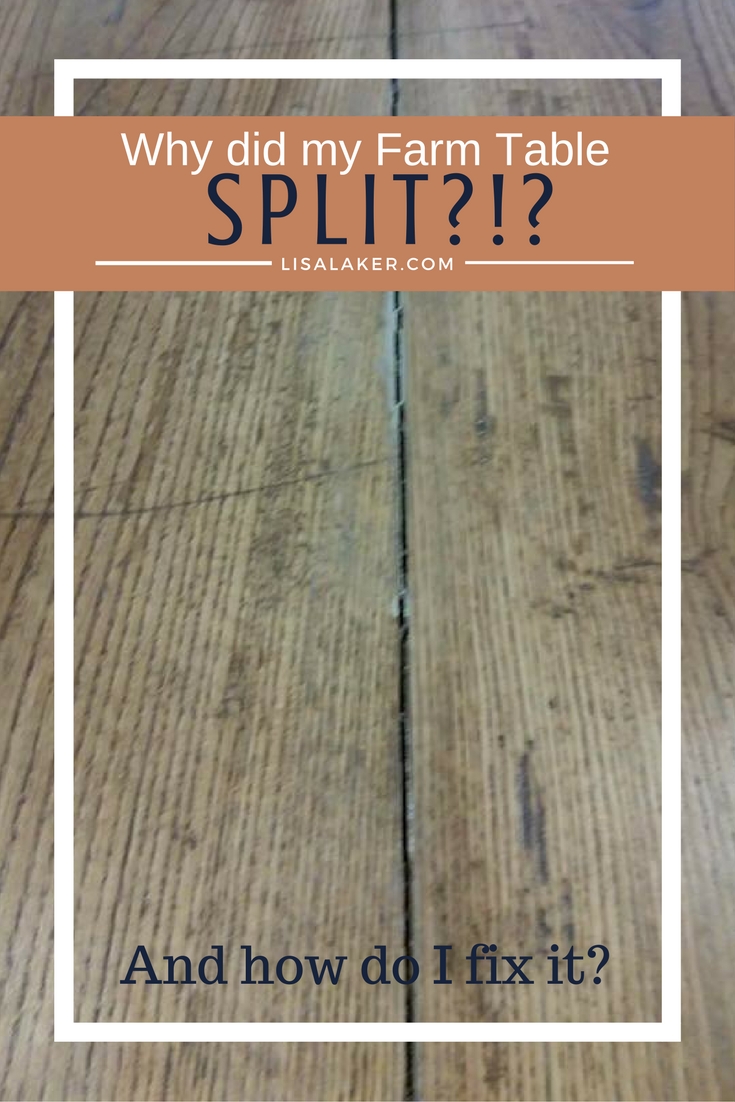
Farmhouse tables! I LOVE the style: rustic, weathered, and a little rickety! But when the top starts to pull apart, it becomes a little hard to keep clean and, not to mention, is kind of an eye sore!
There are many factors that can play into a table top splitting down the center. The kind of lumber used–people are building tables with construction grade lumber that isn’t kiln dried. There is a reason that 2 x 4’s are sold so cheap. There could also be a high moisture content in the wood that was used. So as the wood dried out, it shrank and pulled apart. But the most common reason is that the table tops are being put together in a way that doesn’t allow the wood to move.
There are plans all over the internet for farmhouse tables. And over half of them are teaching people to put together a table top with a kreg jig. Now, I am personally not a fan of the kreg jig. They are easy to use and very quick but the traditional forms of joinery hold up better. However, there is nothing wrong with joining all of the vertical boards together with a kreg jig and glue. BUT, the breadboard (end boards) can’t be fasten on that way. Here’s why:
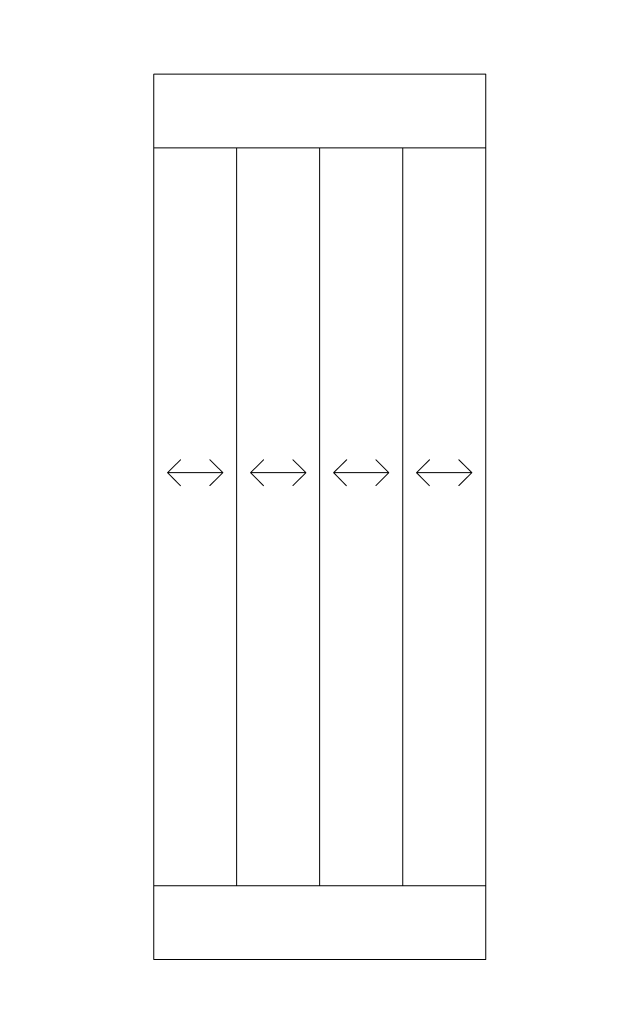
Wood has to be able to expand and contract; there is no stopping it. It expands and contracts across the grain making them wider in the winter and narrower in the summer (opposite of us). If the breadboards are glued or screwed into each long board, that’s not going to allow expansion/contraction. So when the boards do contract, they are going to pull apart from each other at the weakest point.
Here’s how to fix it
Disclosure: This post includes affiliate links, which means I receive a small commission if you purchase. There is no extra cost to you. Purchasing through my affiliate links help support my website so I am able to continue posting free content.
Tools you will need:
safety glasses
ear protection
circular saw
drill
1/4″ drill bit
plunge router with or without a guide
1/4″ upspiral router bit
rubber mallet
hand plane (if needed)
pencil
tape measure
hand saw
Materials needed:
1/2 x 2 x 4 If your table is 3/4″ thick
–OR–
1 x 2 x 4 If you table is 1 1/2″ thick
3/8″ dowel rod
wood glue

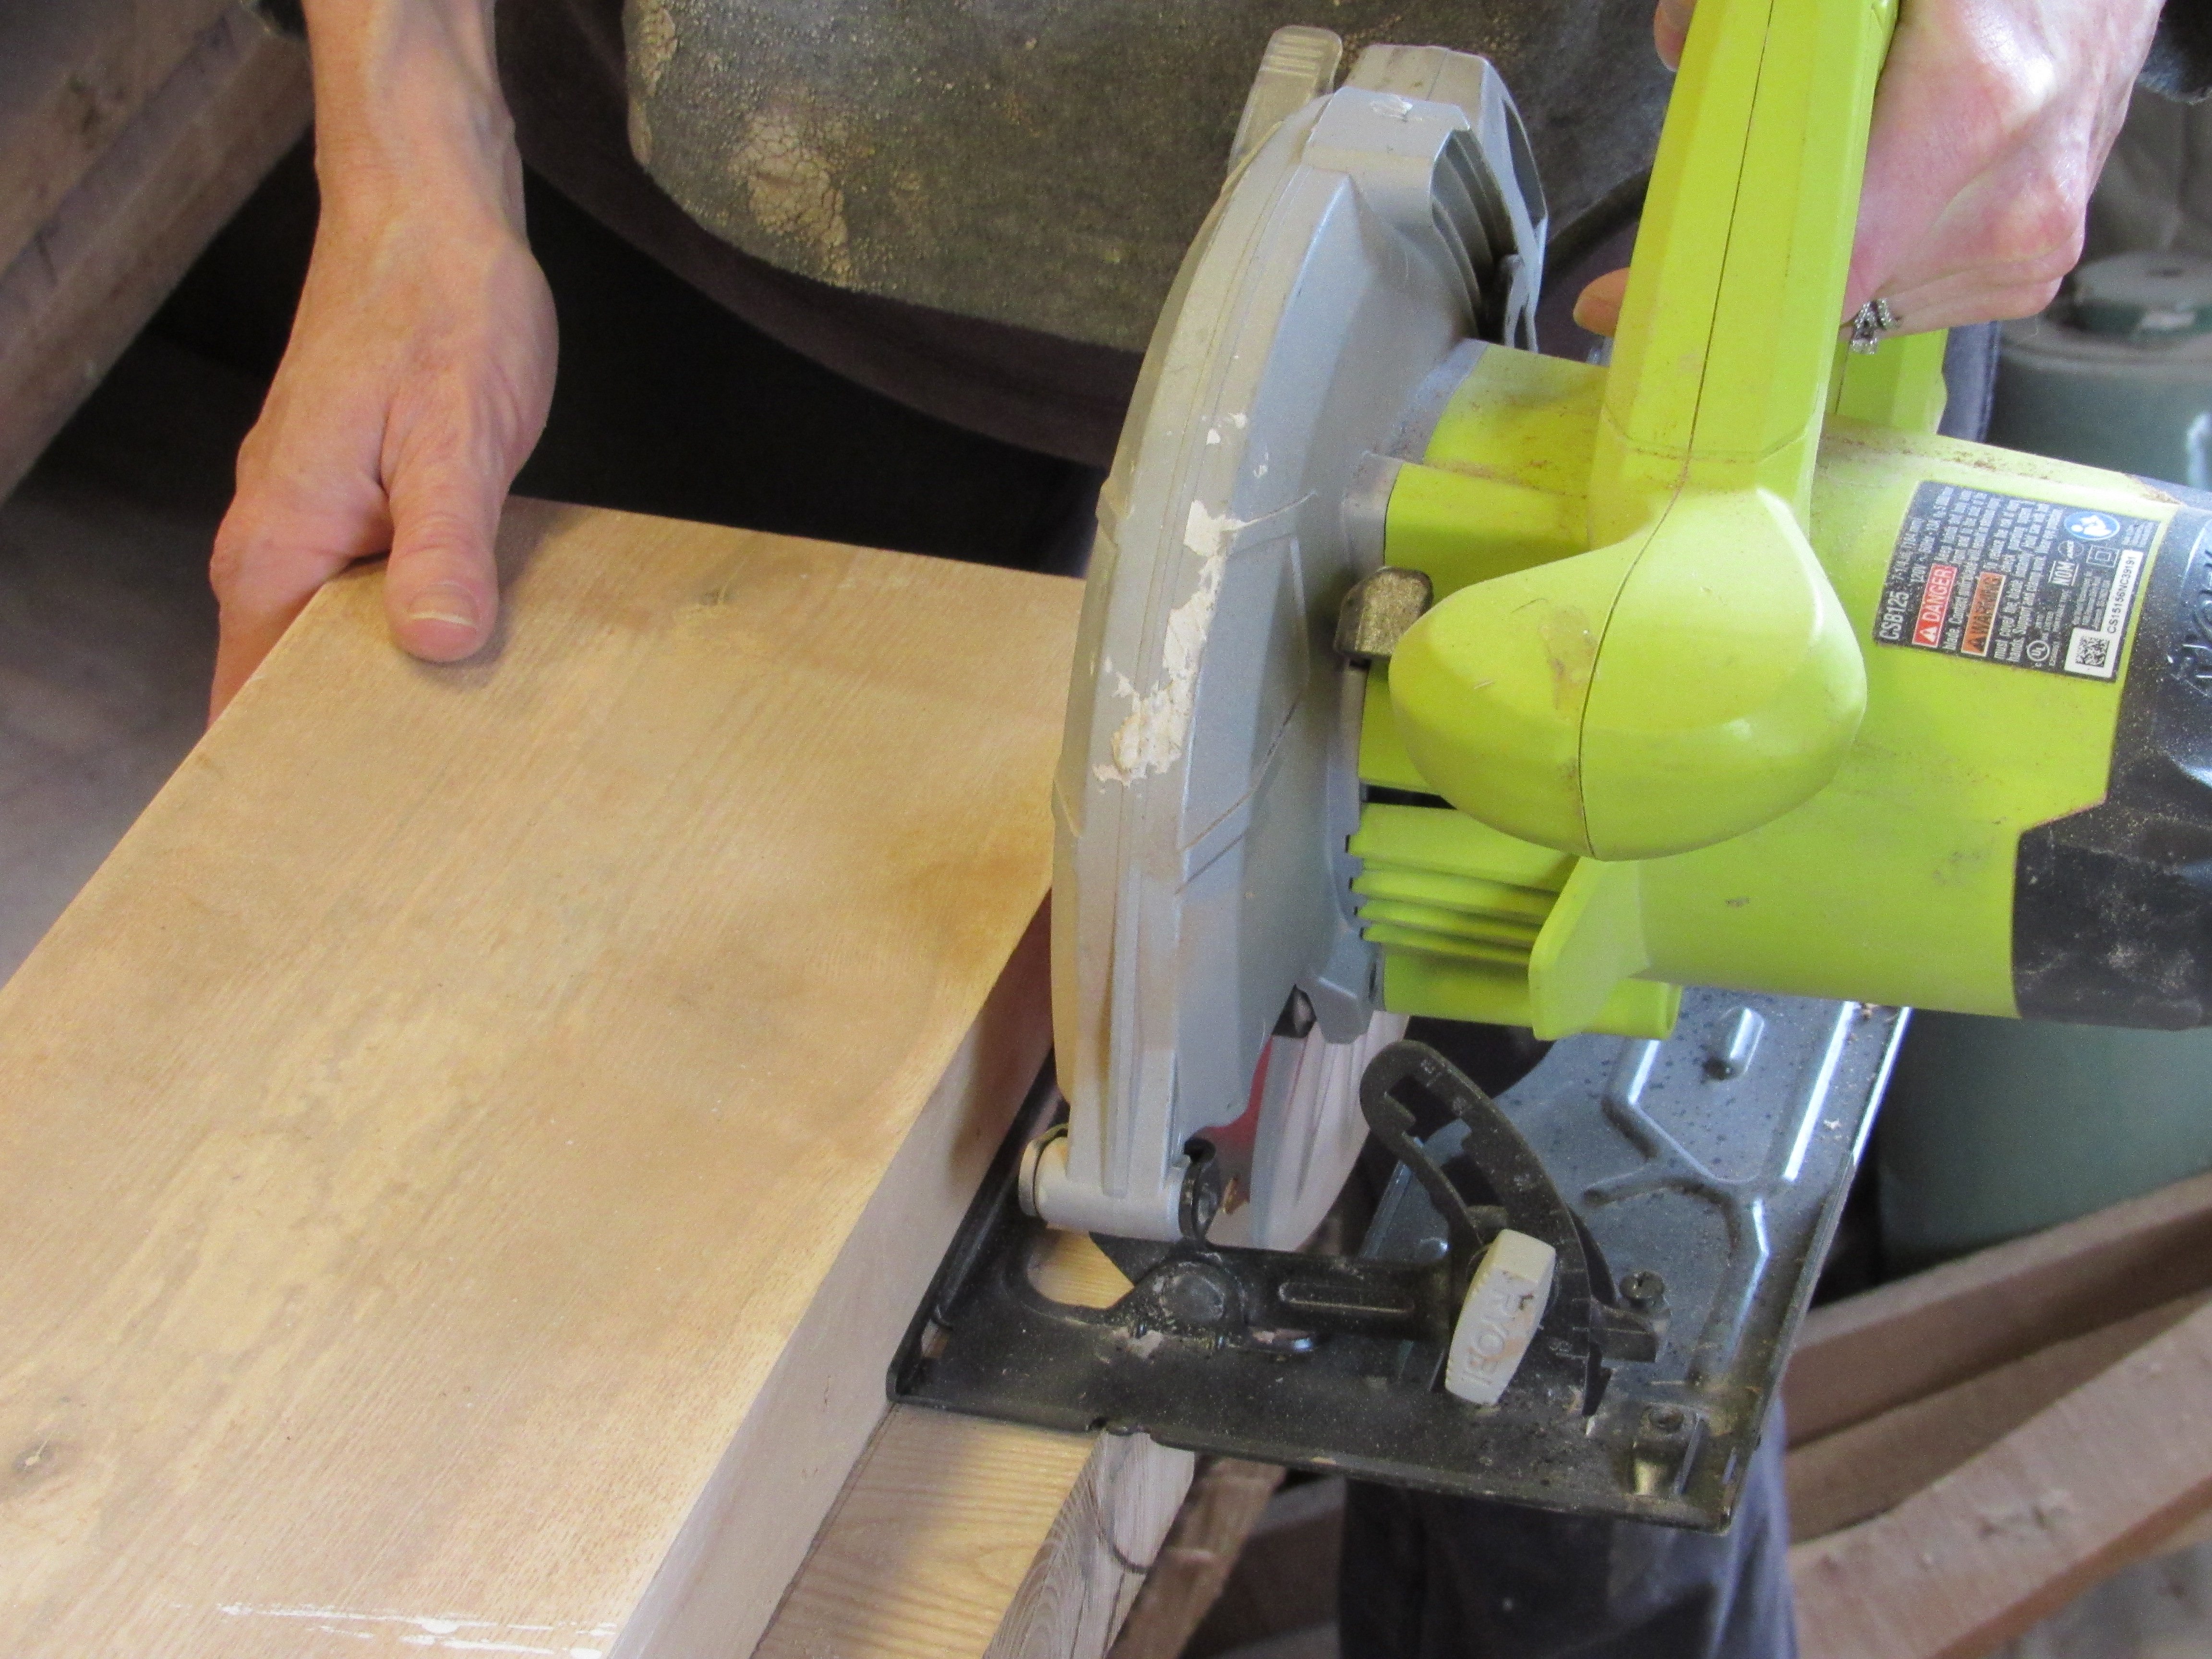
1. Unscrew and/or use a circular saw (if glued) to cut off each breadboard. You can do this by clamping a board to the table and running your circular saw along the board. Start by only cutting in 1/4″ and lower your blade 1/4″ more after each pass to prevent your blade from flexing. If your blade has flex in it and the board was cut off at a slight angle, you can run your breadboard through a jointer or fix it with a hand plane.
2. Use a 1/2 x 2 x 4 (assuming your breadboards are 3/4″ thick) and cut it into 2″ pieces. A board sold as 1/2″ is really only around 3/8″ thick.
3. Line your breadboard back up with the table top. Place each piece of wood half way on the long boards and half on the breadboard. If your long boards are wide (around 8″), you can use 2 pieces per board.
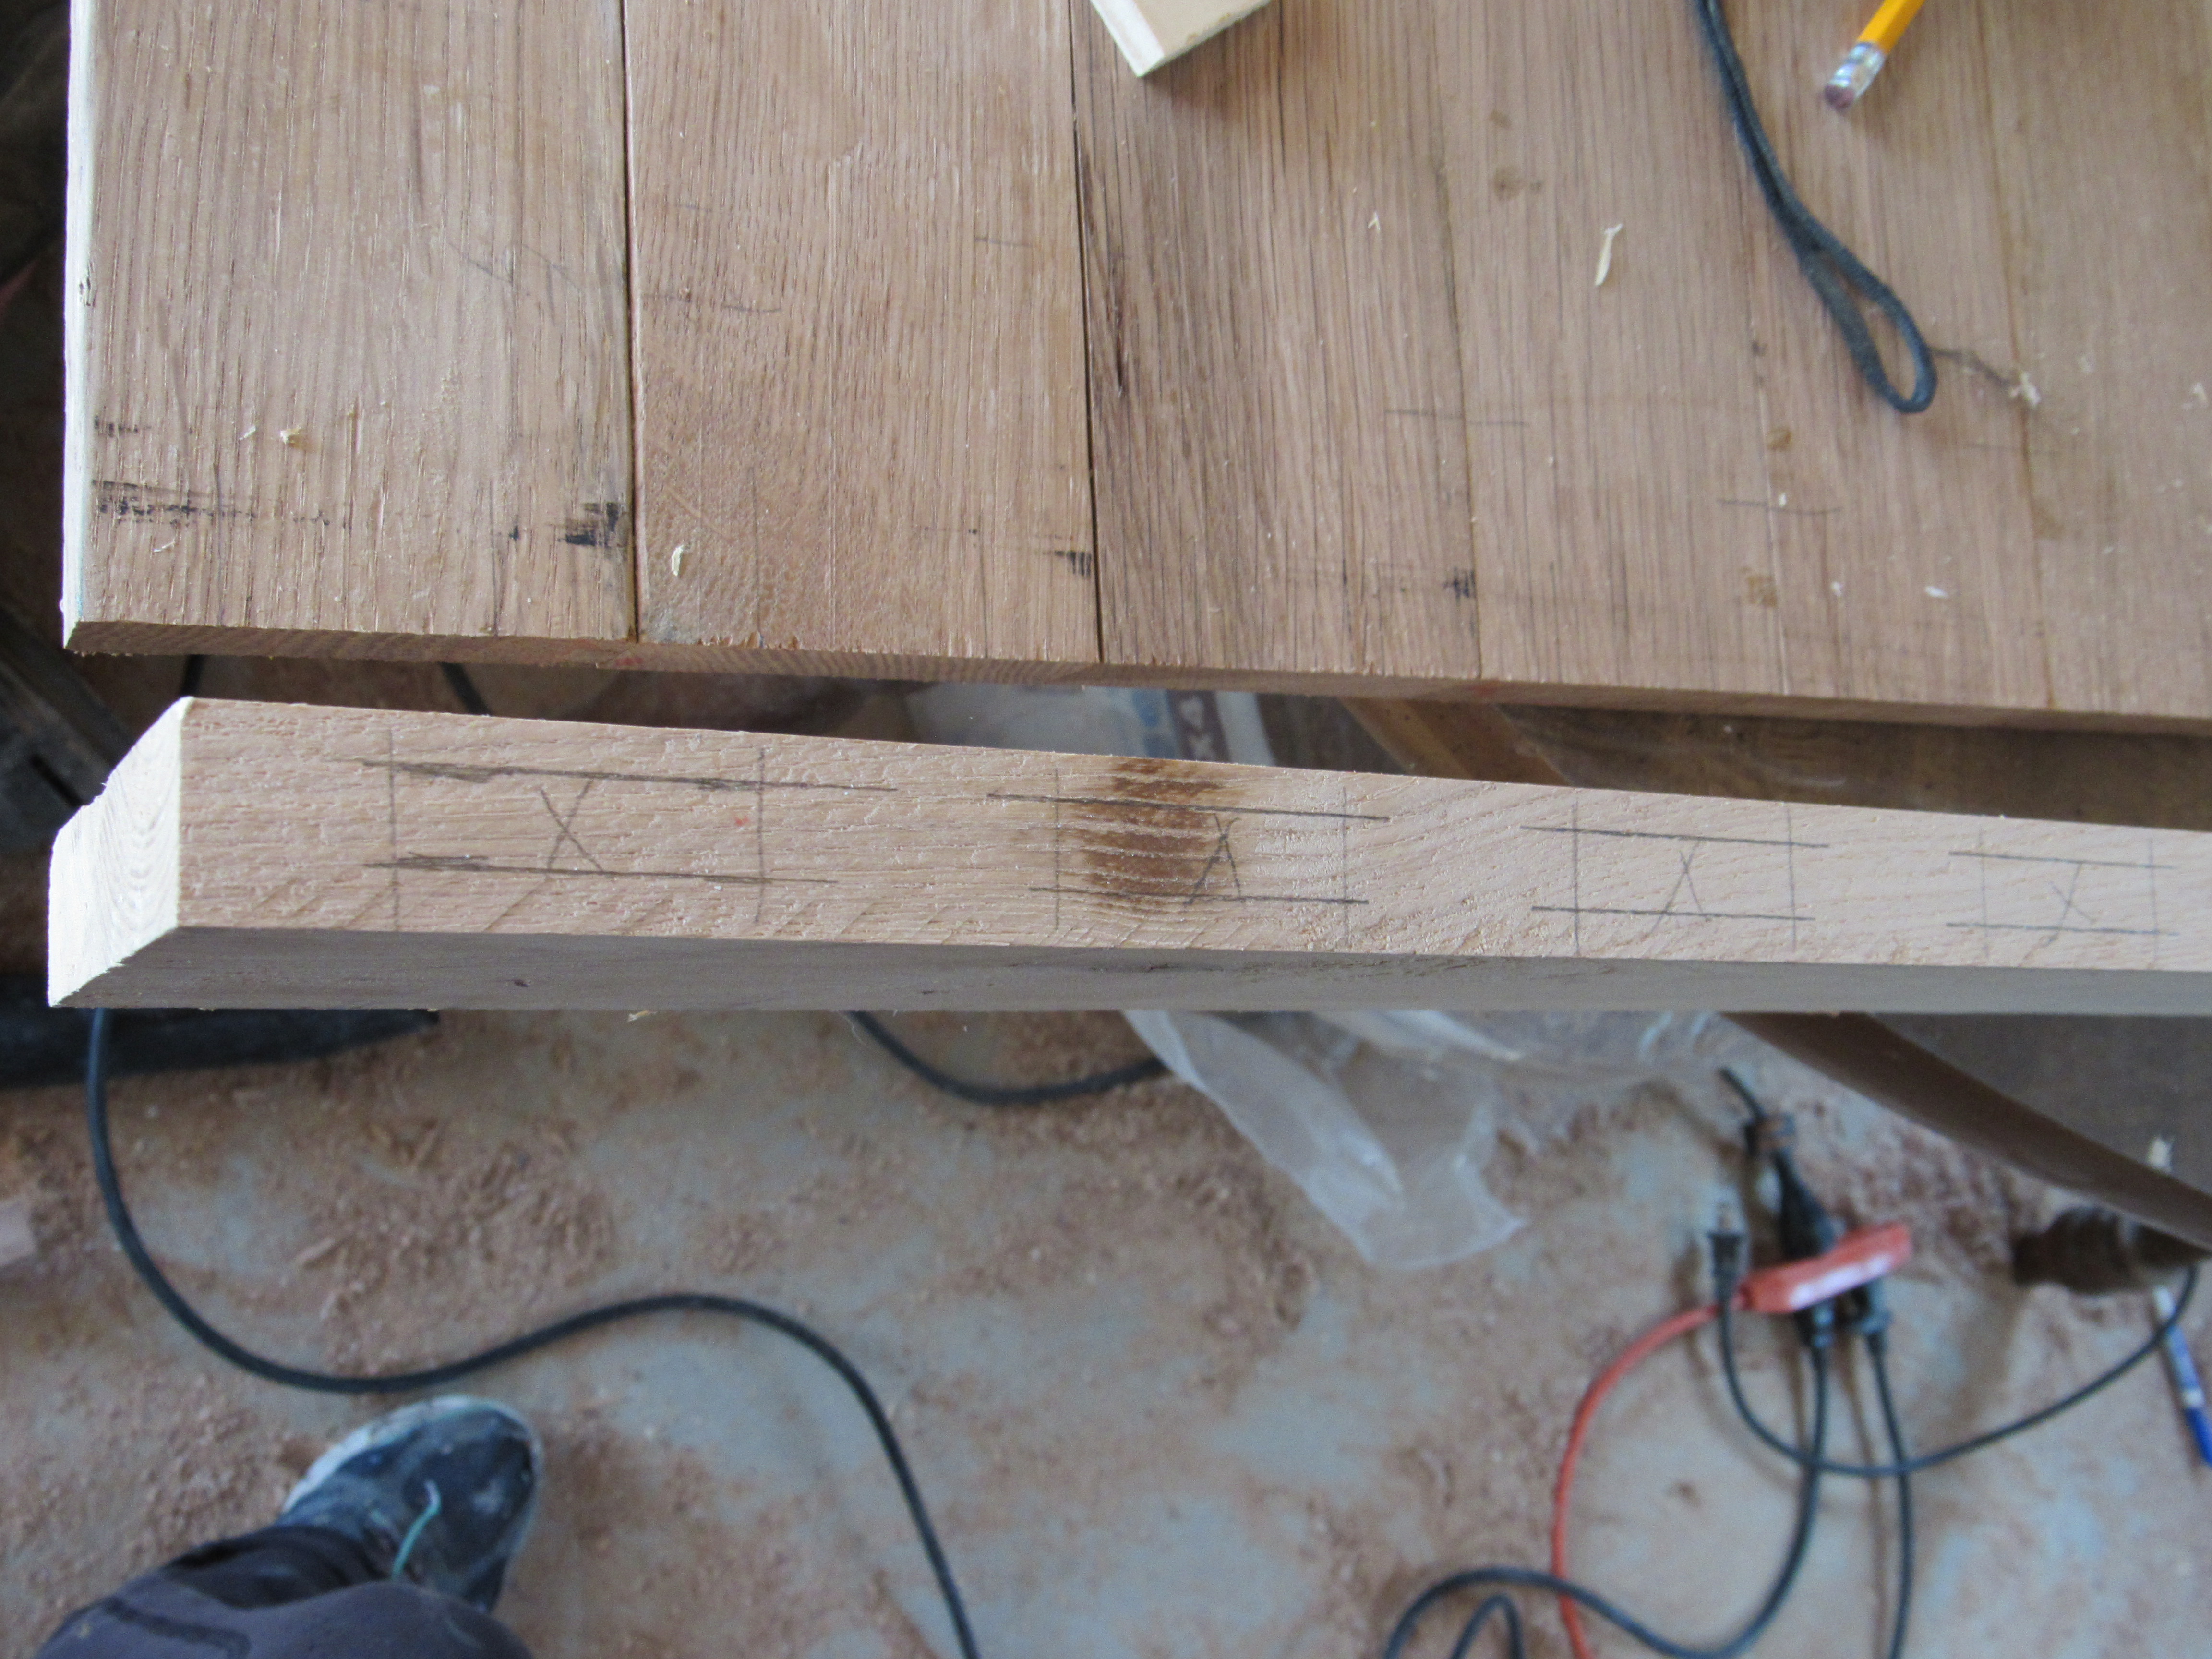
4. Place a mark along the sides of each wood chunk on the long boards and the breadboard. Transfer the marks onto the endgrain of the long boards and the inside edge of the breadboard with a square.
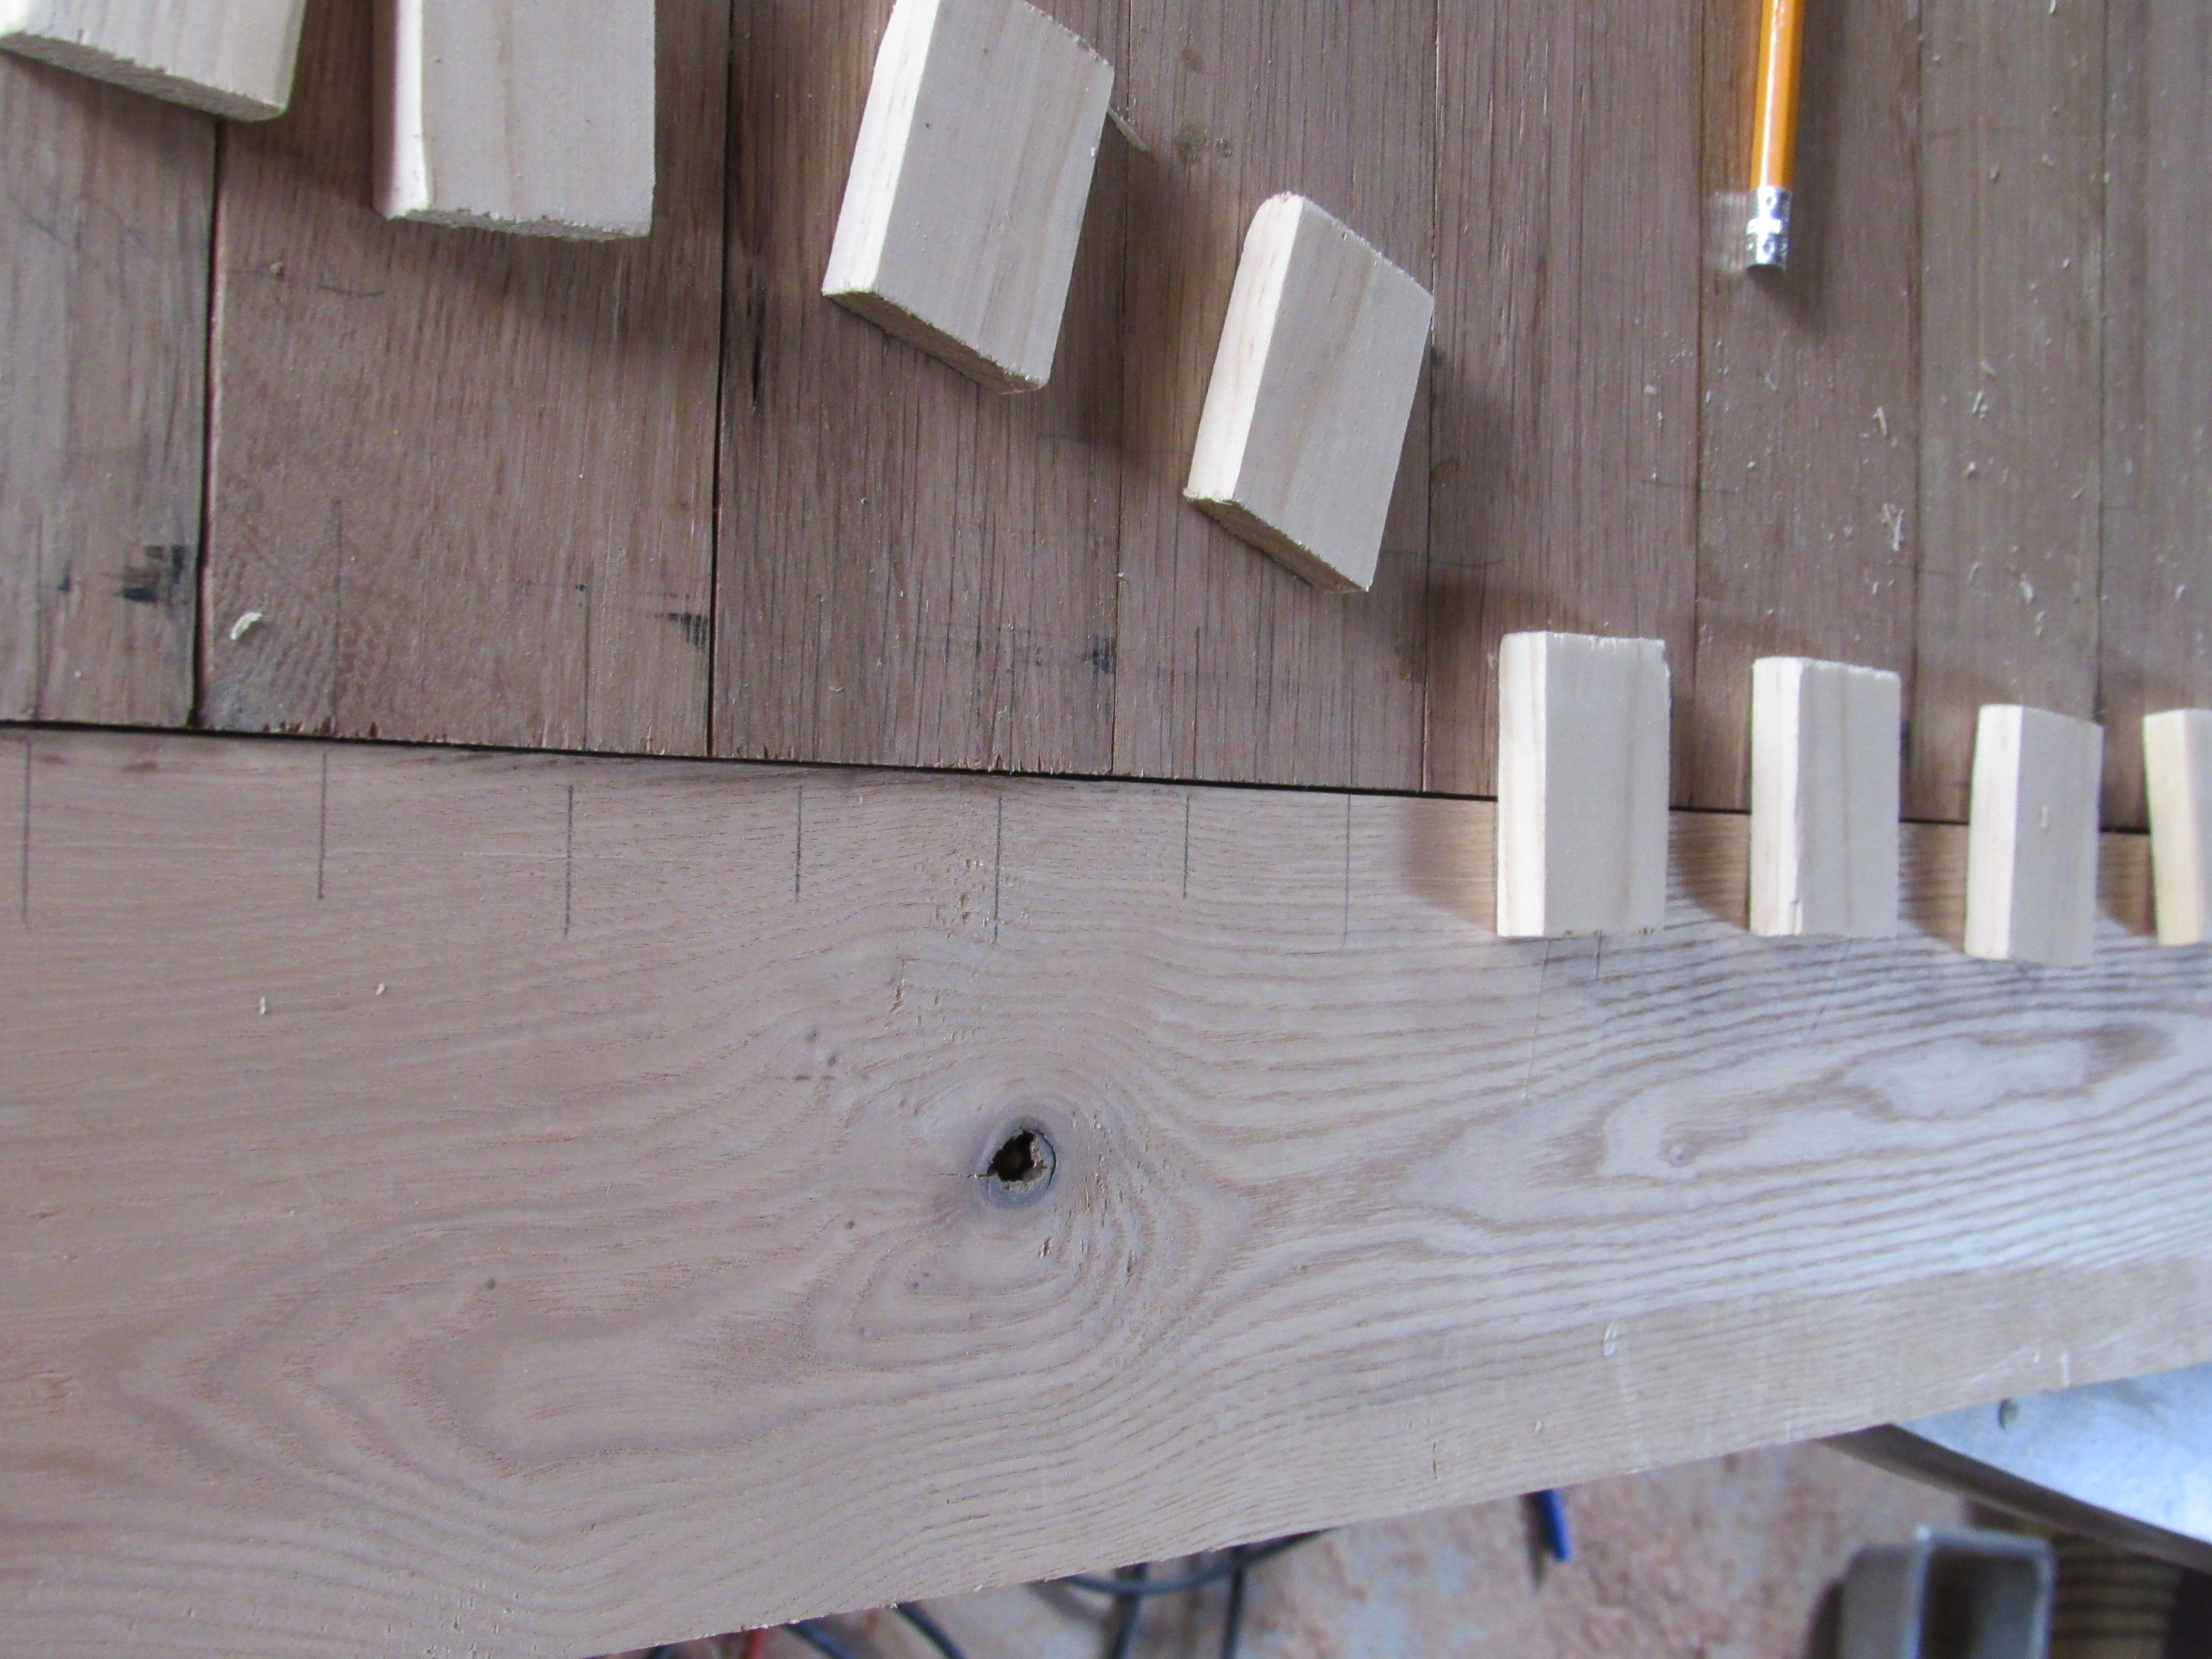
5. Center the measurements of the wood chunk’s thickness to the side of your breadboard and the end grain of your long boards. My breadboard is 7/8″ thick. My wood chunk is 3/8″ thick. So I placed a mark 1/4″ on the top and bottom of each side of the breadboard and used a straight edge to draw the rest in.
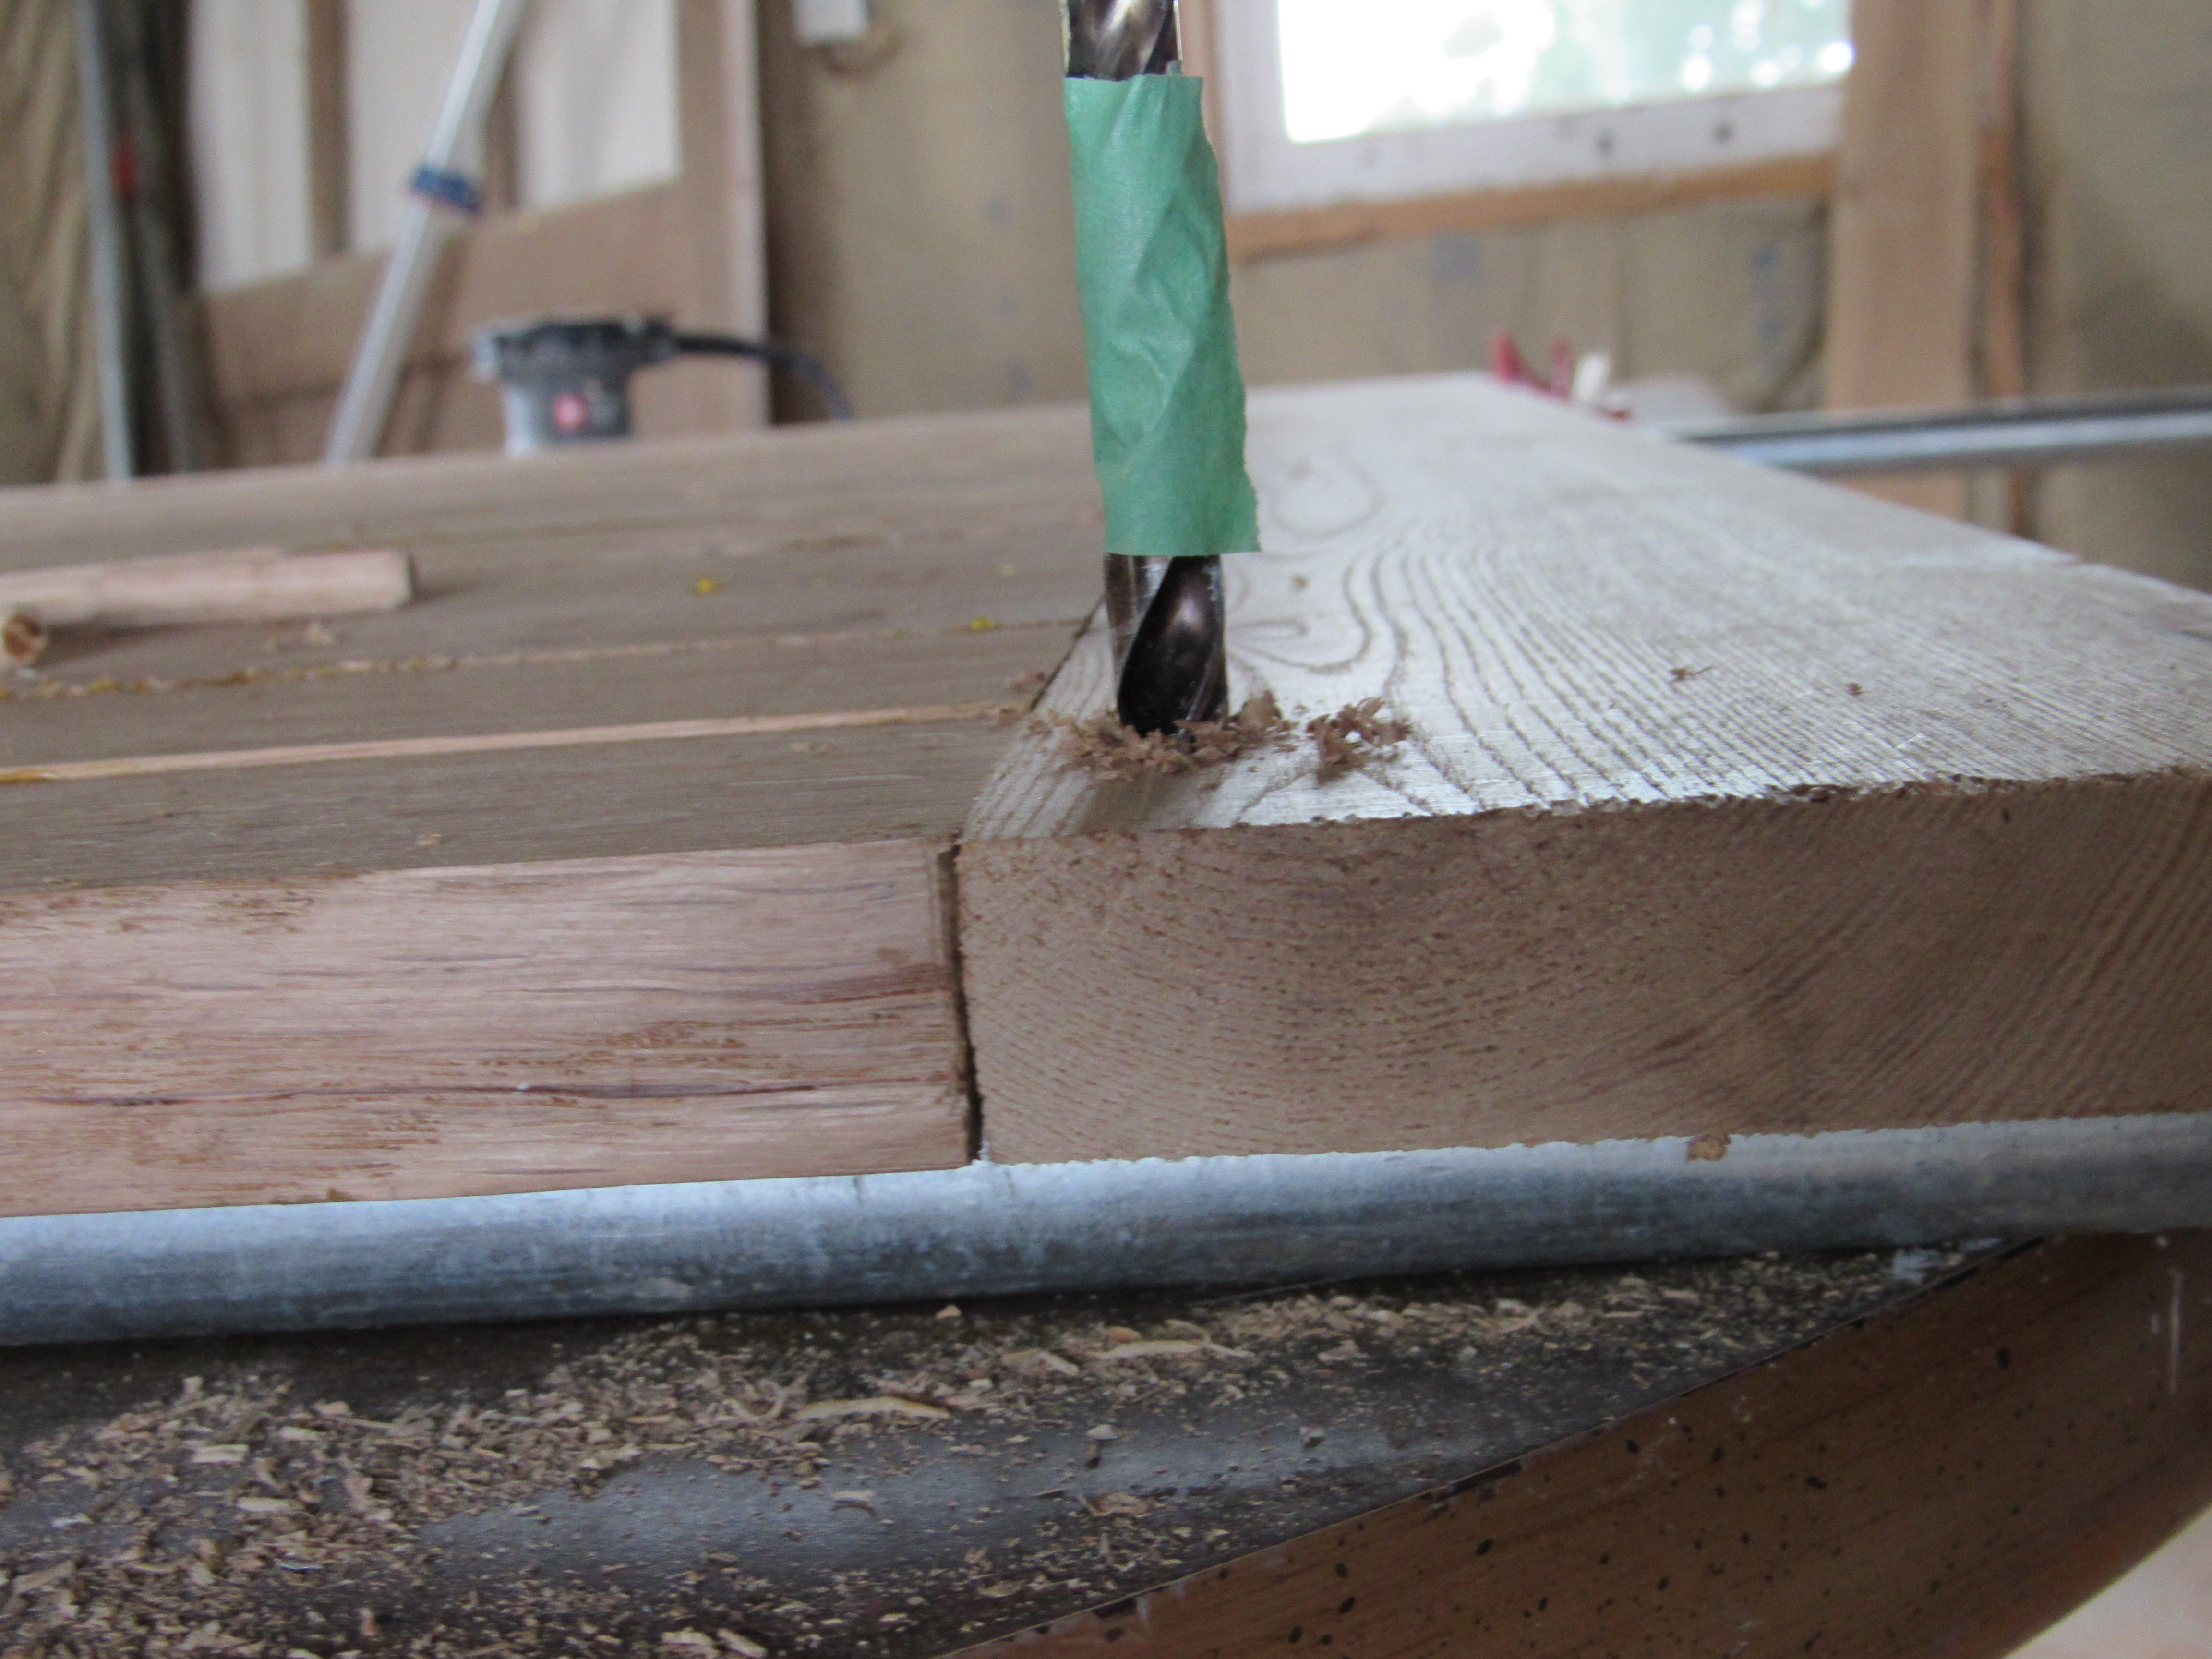
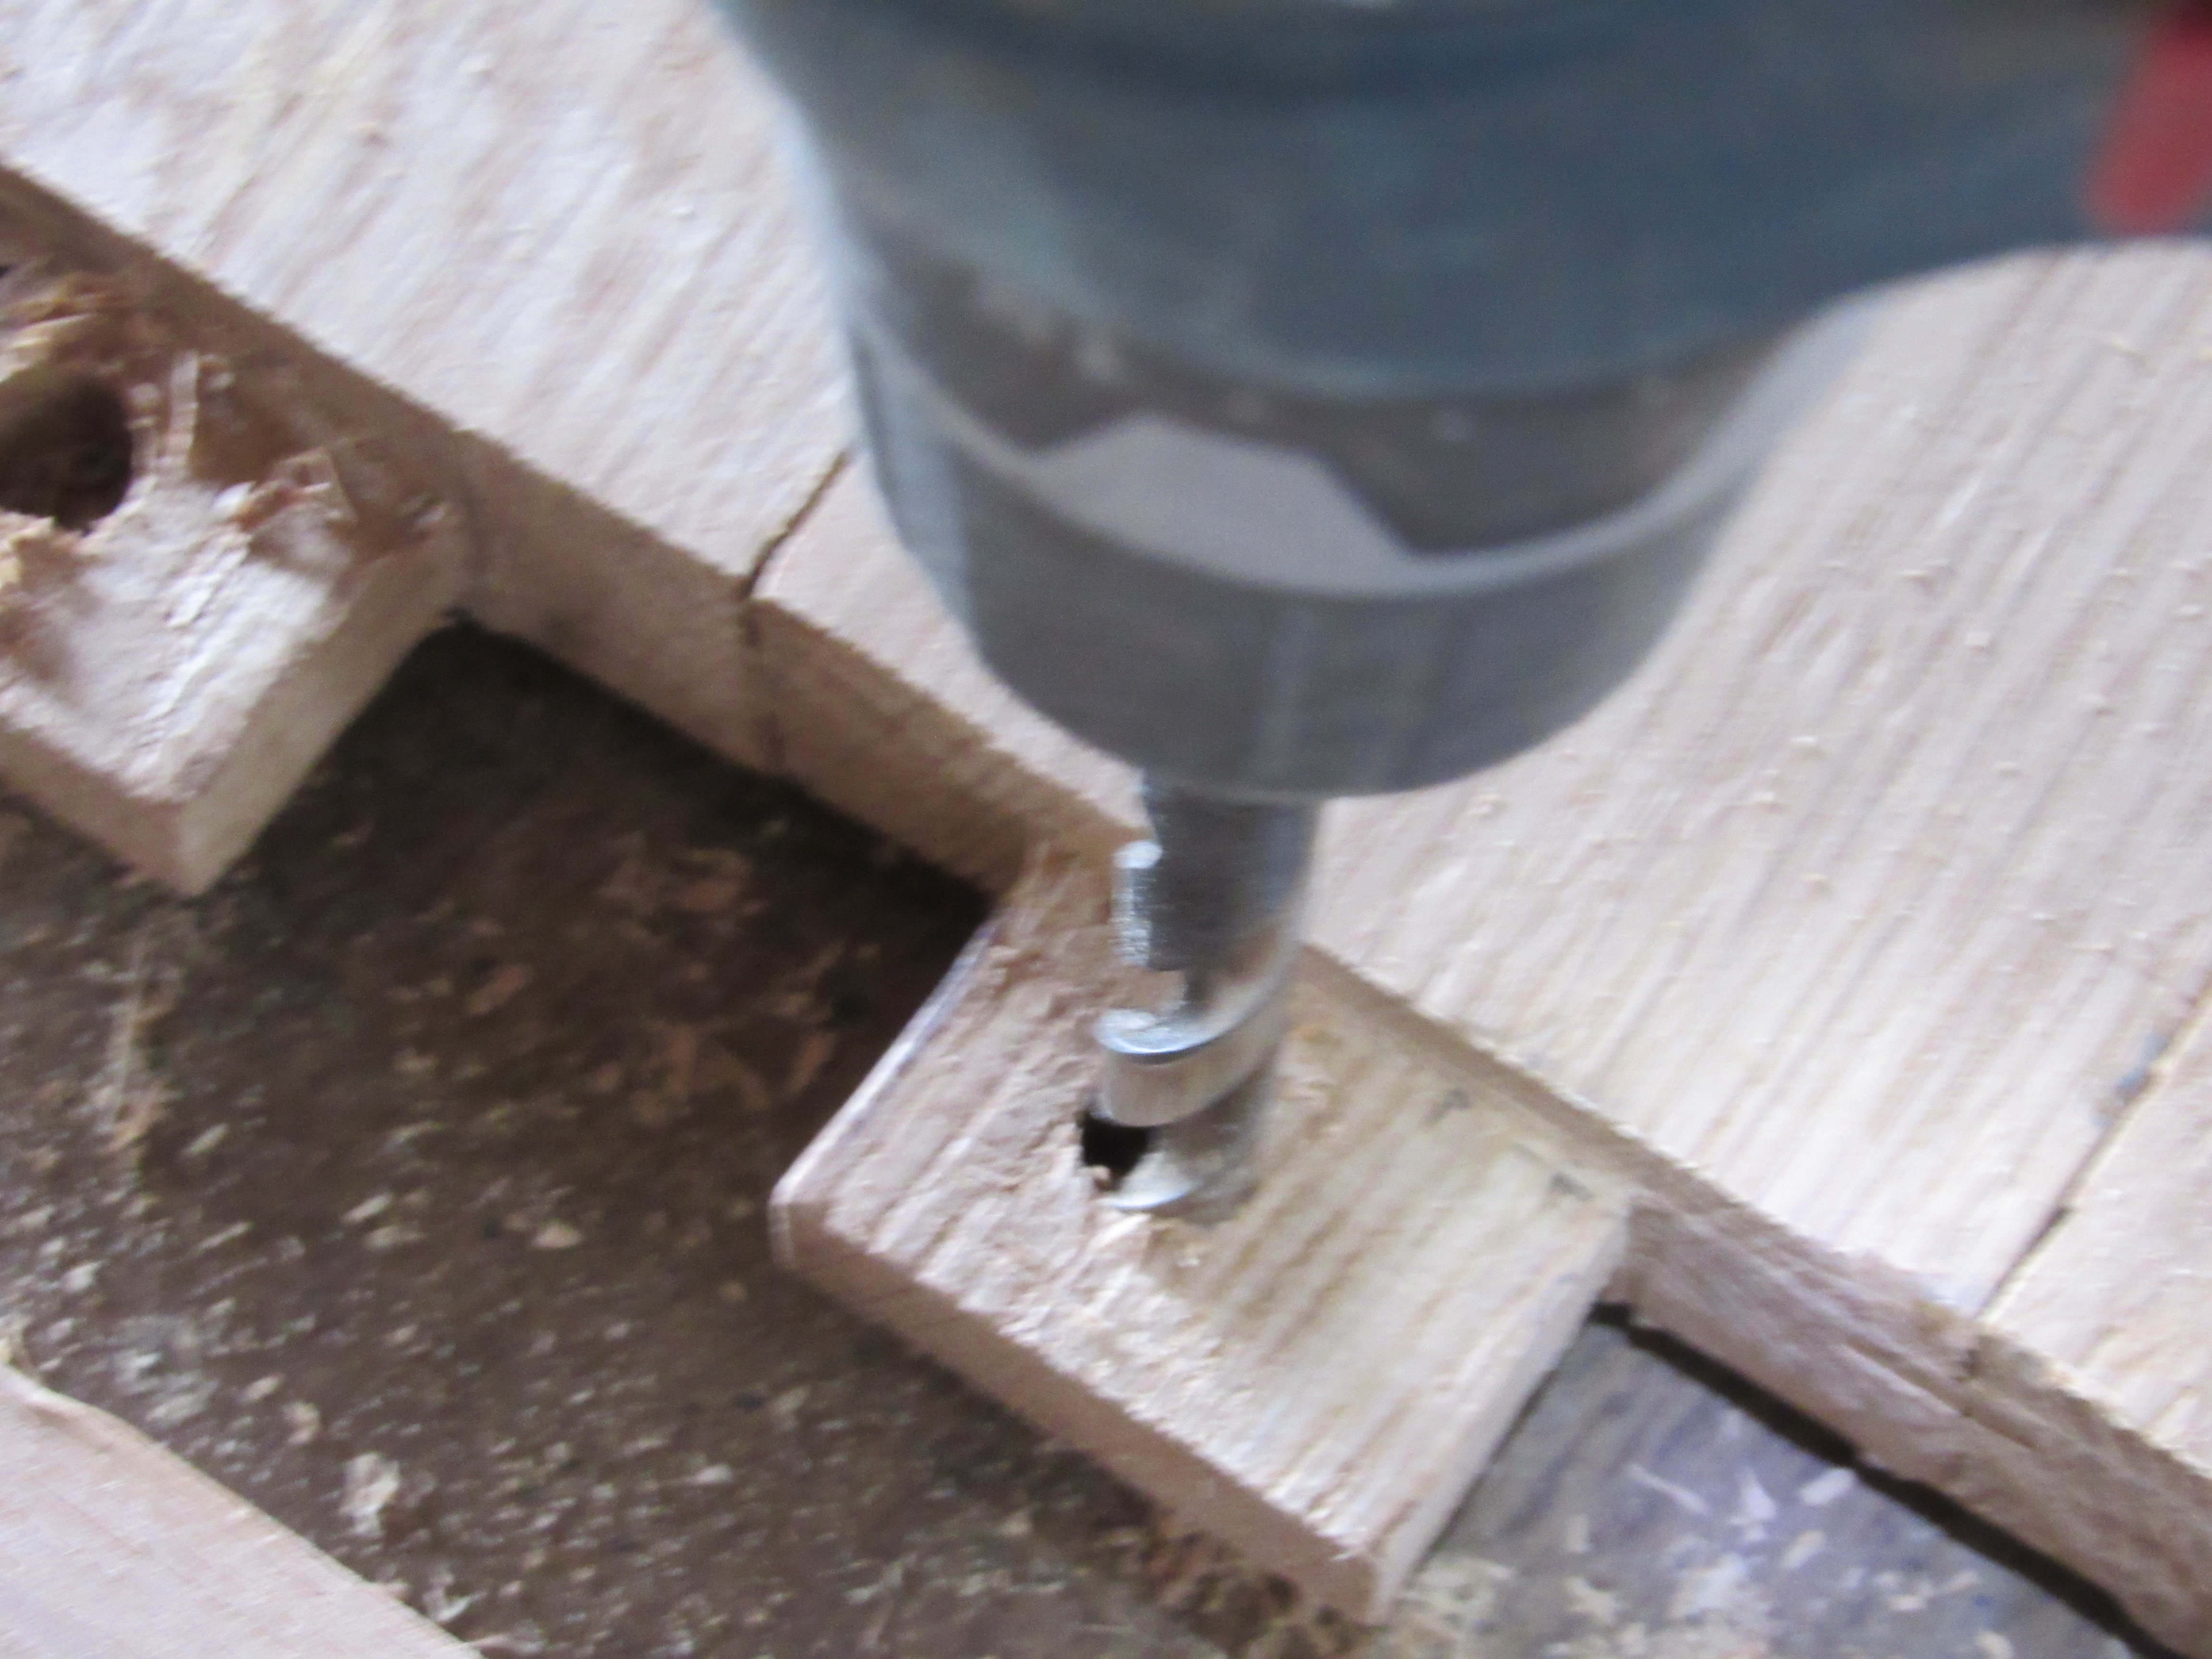
6. Clamp your breadboard to a sturdy surface and use a plunge router with a 1/4″ upspiral bit to router all the “wood chunk holes”. These should be slightly wider than the wood chunk by 1/16″ on each side. We are essentially making a mortise hole. For more tips, click here.
7. Do the same into your end grain. These need to be tight. You want all of the wood chunks to fit snuggly into the mortise hole. Test each hole as you router. 8. Place the wood chunks into the end grain and fit the breadboard on. Clamp the board on so it’s a nice, tight fit against your long boards.
9. Flip the top over so you are working on the underside.
10. Place tape or a mark on a 1/4″ drill bit 3/4 of your table top thickness. Drill 3/4 way into the breadboard at each wood chunk. If you like the look of pegged furniture, you can drill all the way through.
11. Pull the breadboard back off.
12. Glue each wood chunk into the end grain. Widen the hole slightly by inserting your drill bit back in and slightly rocking it left and right.
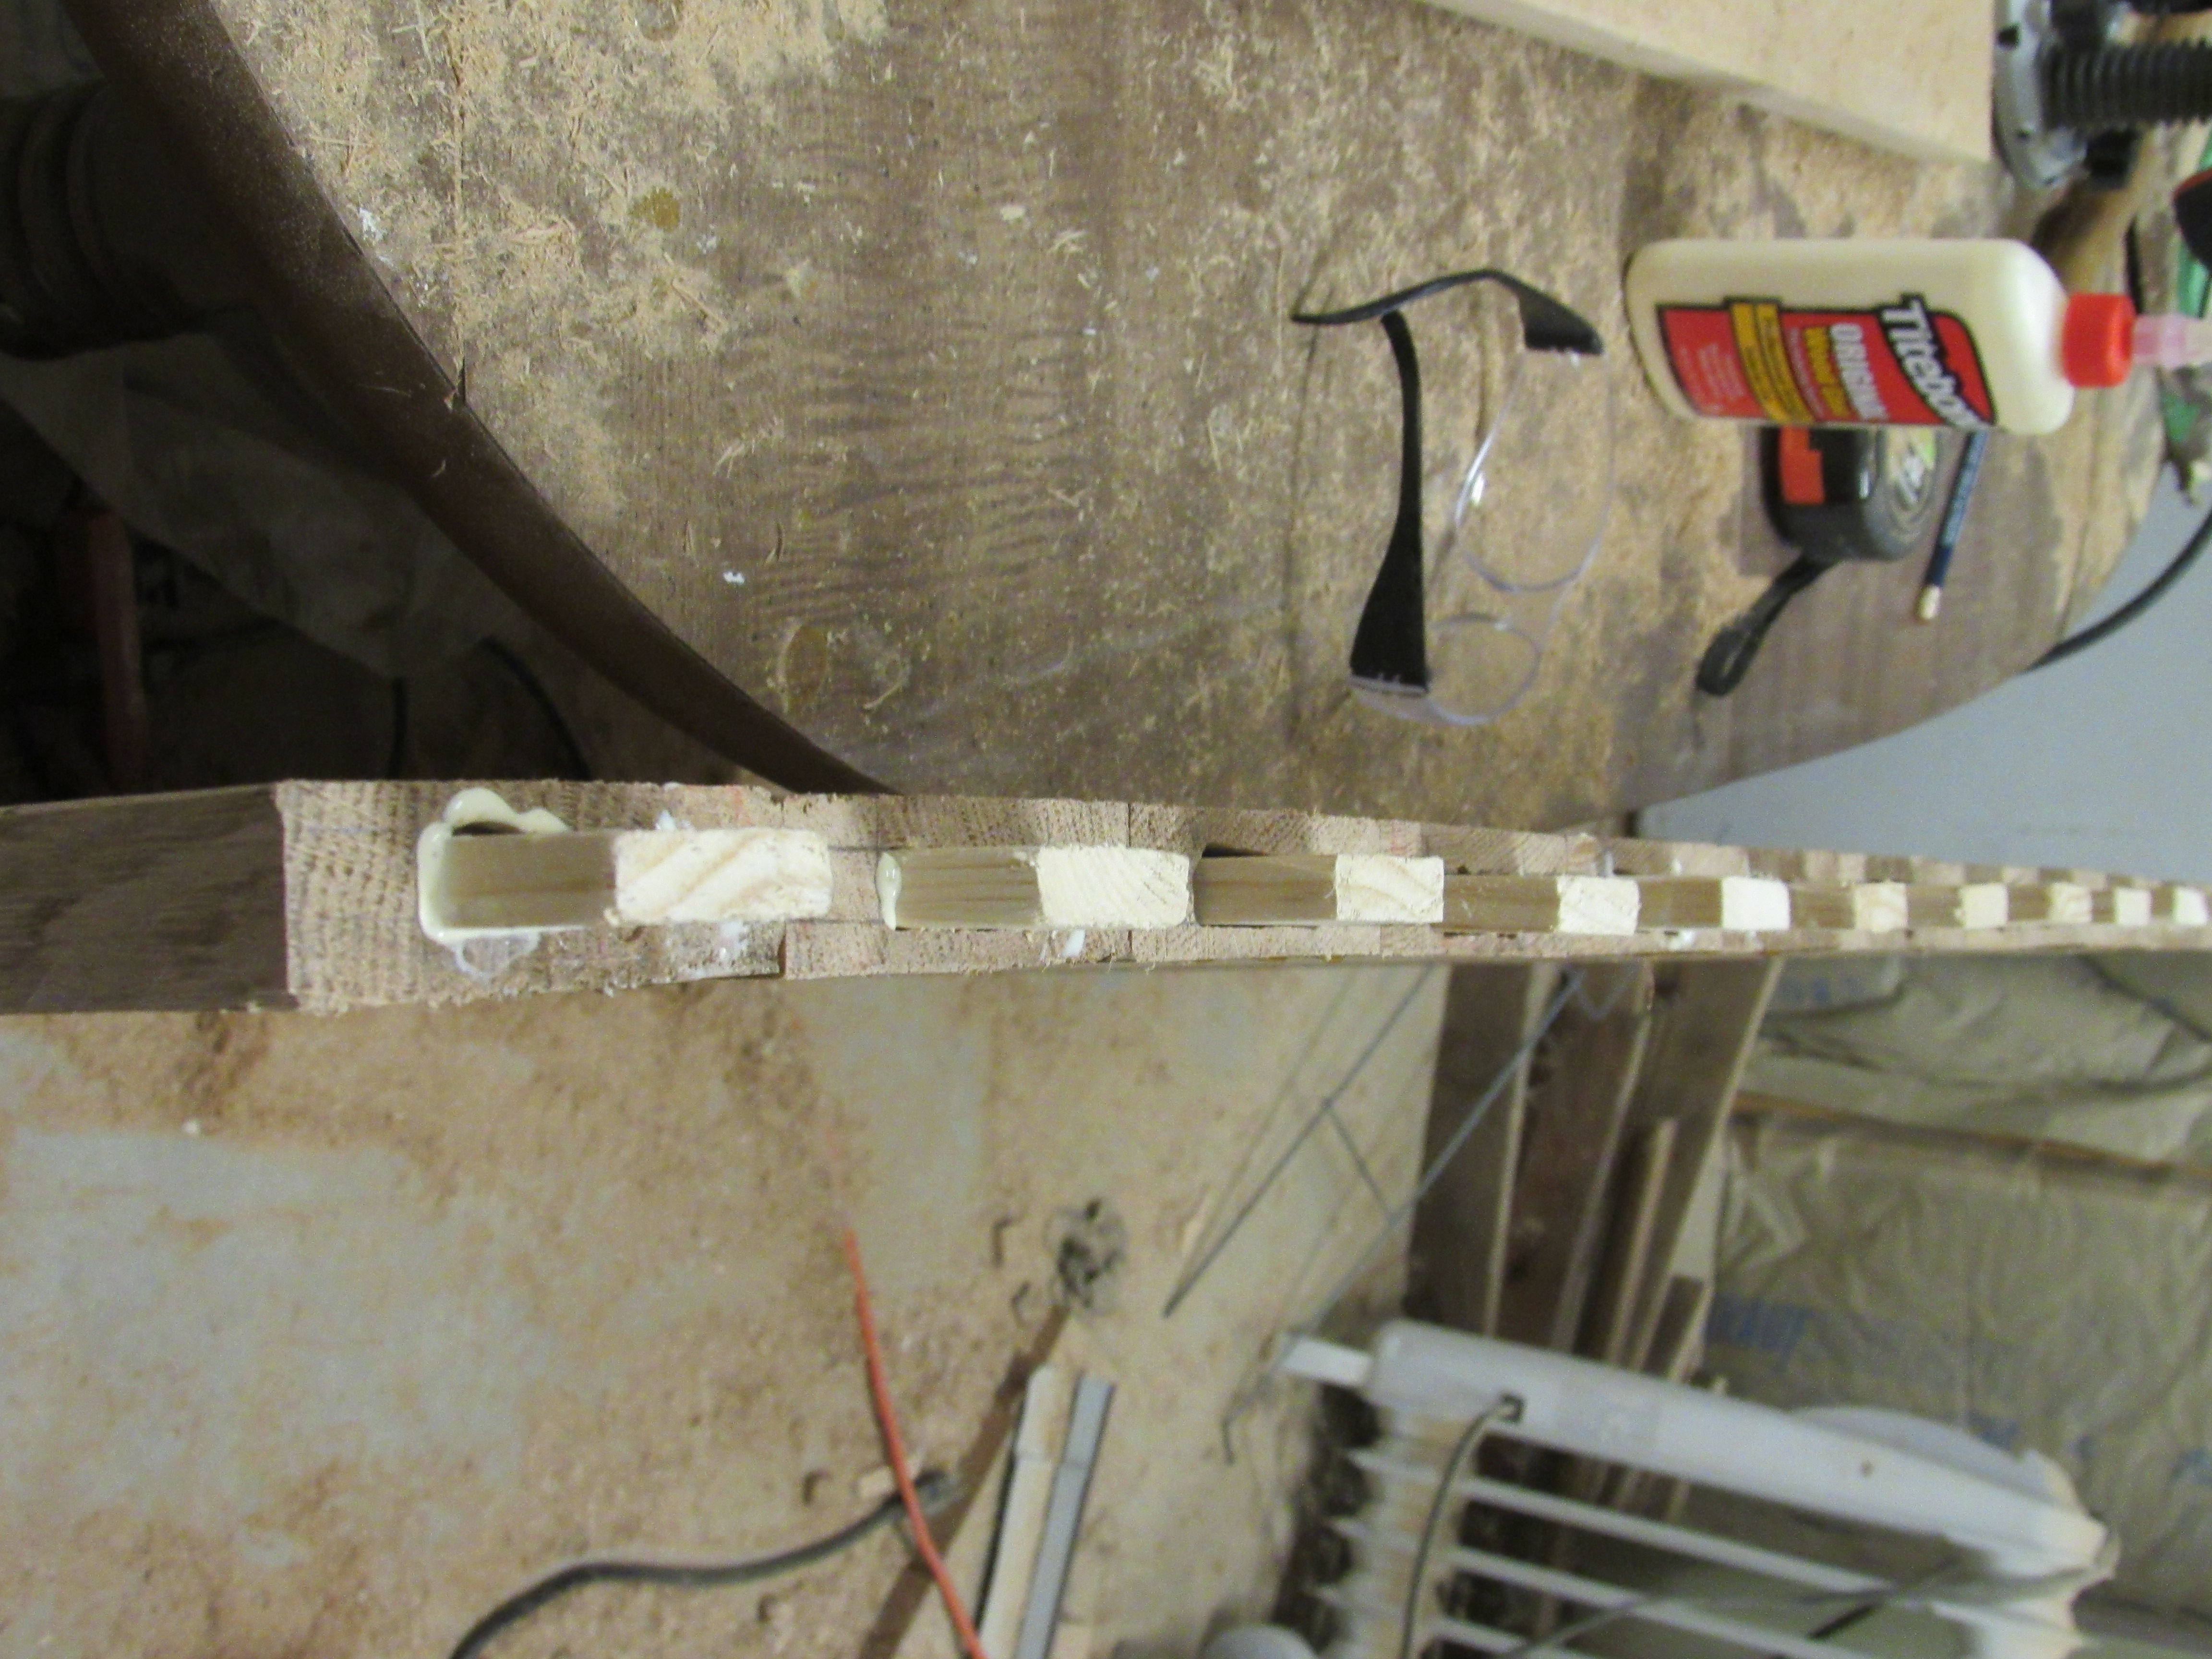
13. Reattach the breadboard (for the last time). DO NOT USE GLUE FOR THIS STEP!! If you glue it back on, you will be restricting the wood movement again! Clamp the breadboard back on and tap 1/4″ dowel pins into each hole. You can either buy 1/4″ pins of you can by a dowel rod and chop it down to 1″ sections (assuming your top is 3/4″ thick).
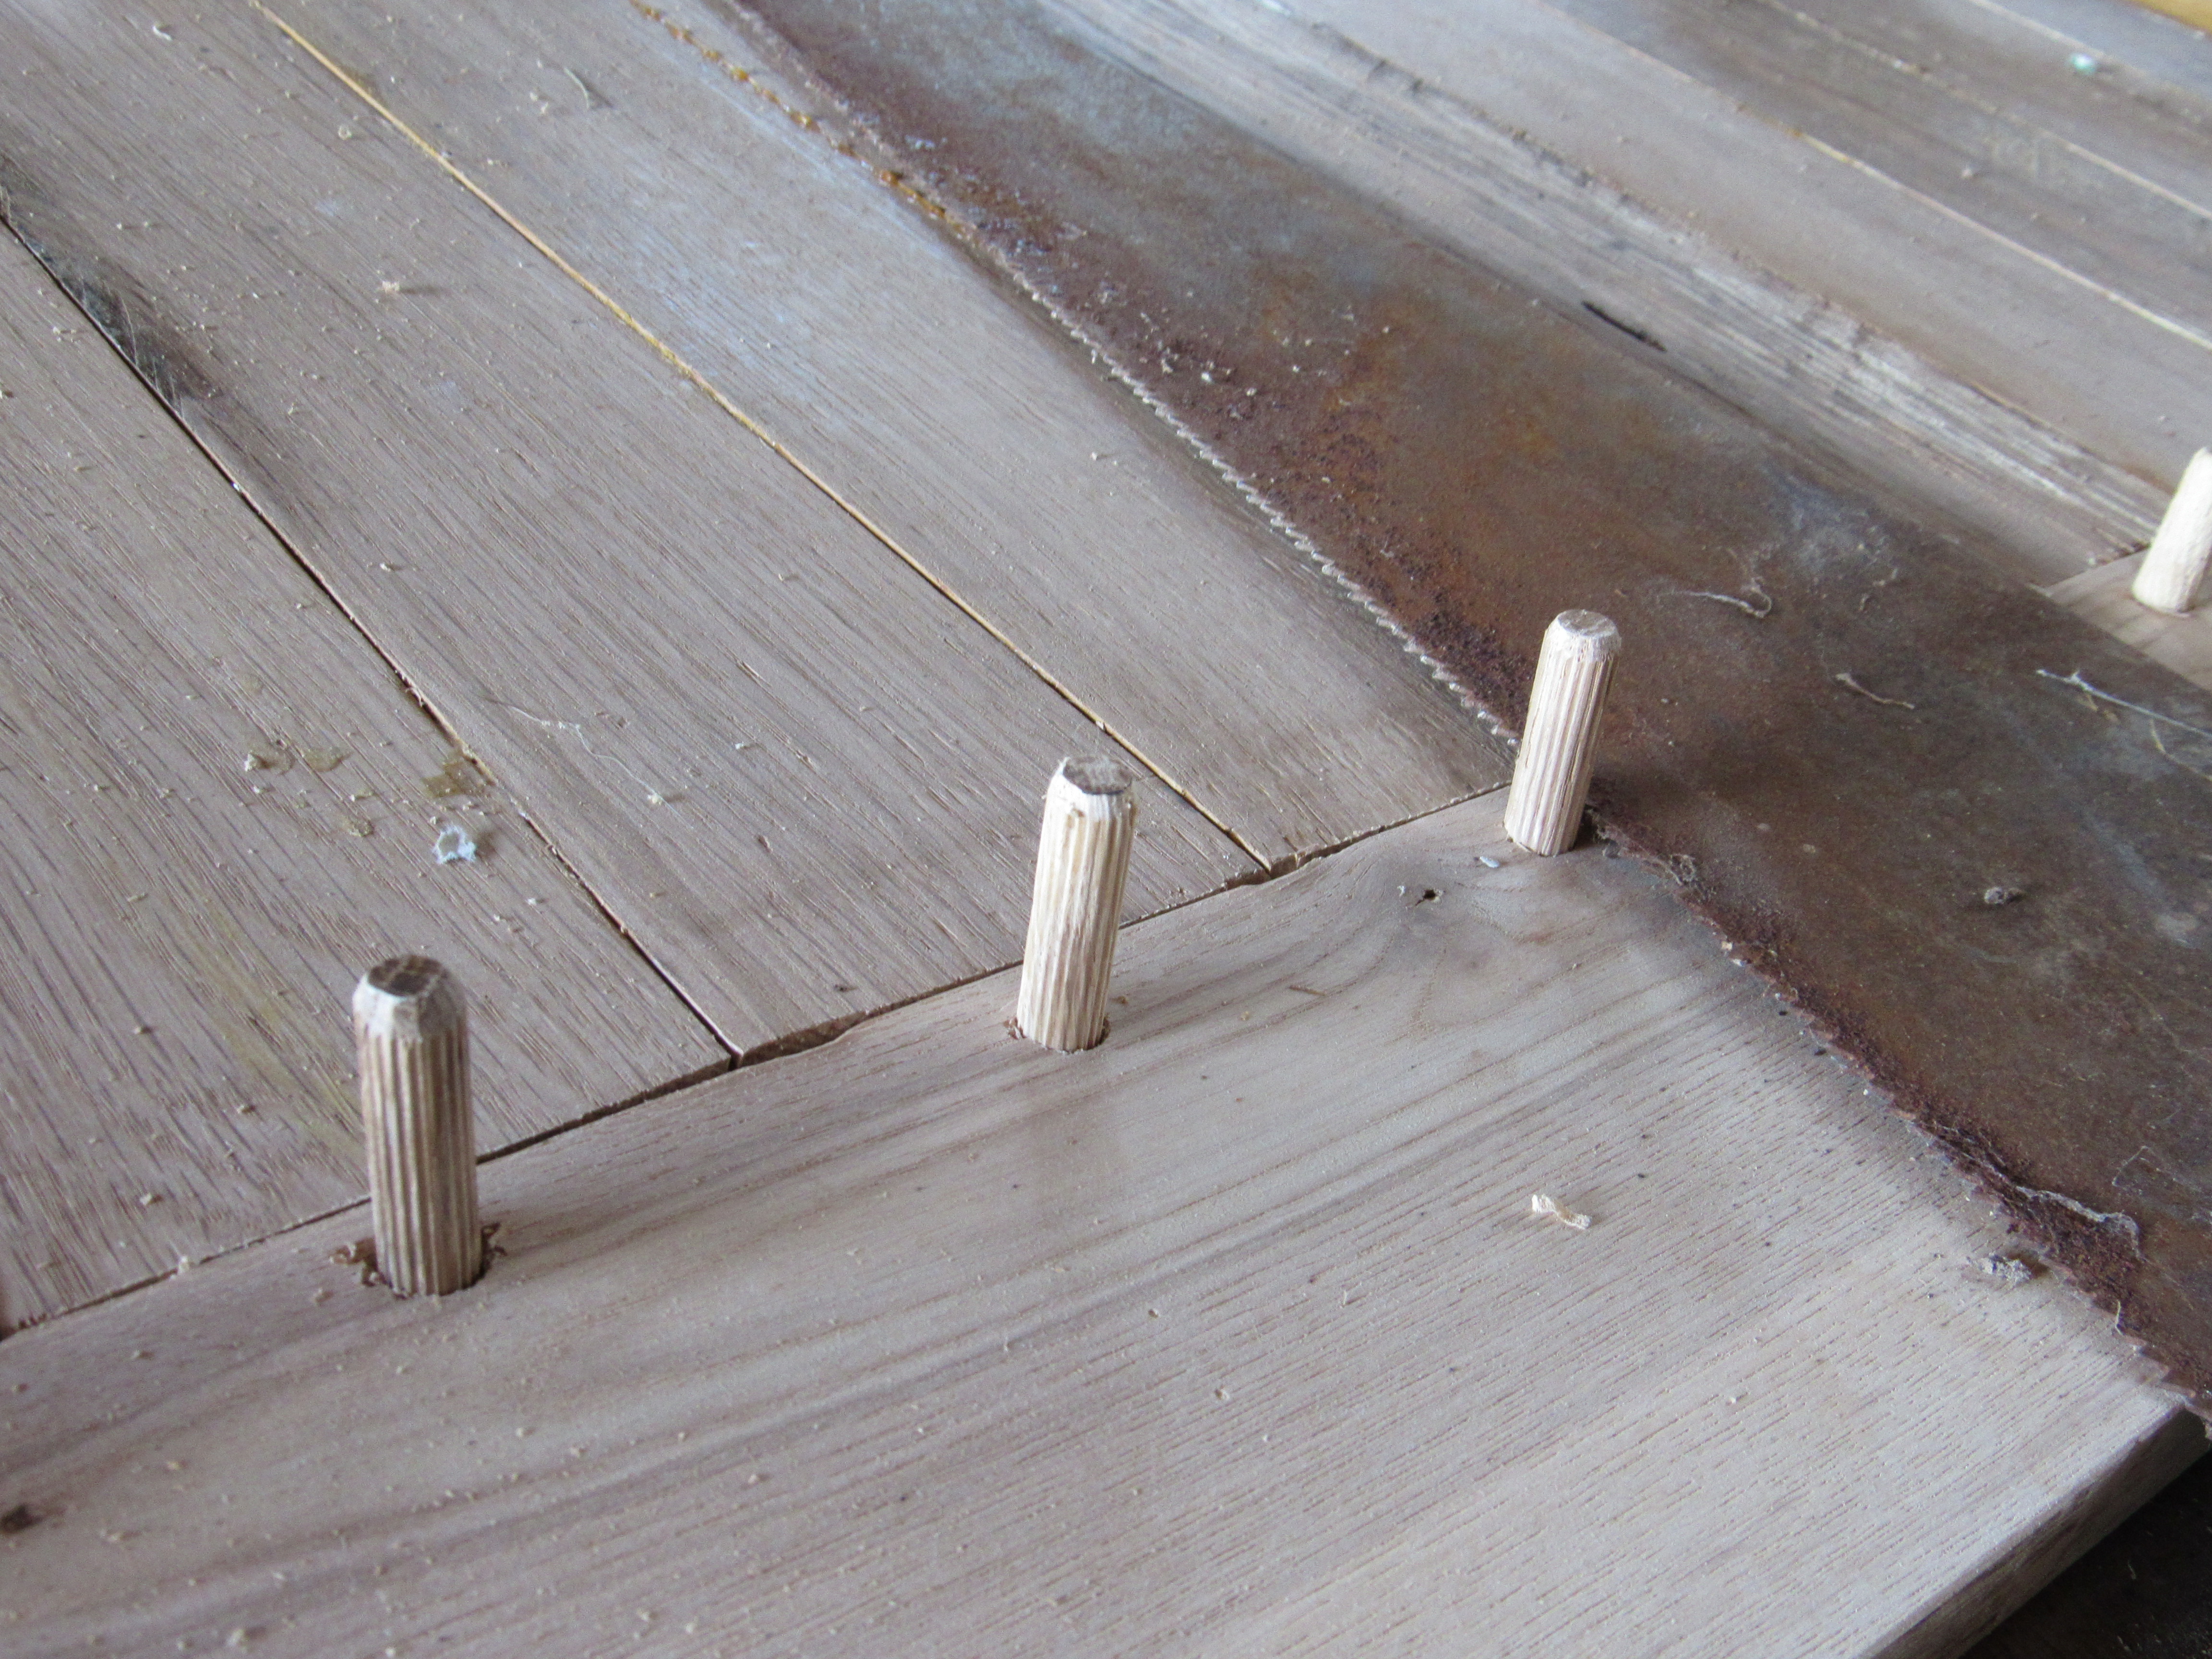
14. Remove the clamps. Use a hand saw to trim the top of the pin off. Sand with 220 grit paper to make it more flush and remove any splintery wood.
15. Flip the table top back over. Use a hand plane to smooth the table top if it’s not lined up perfectly. Refinish. Enjoy!