Coffee Table with Drawers
Free Coffee Table Plans
With 5 kids, the need for extra storage is always an issue. They do have a toy room but there are certain things, for instance, crayons and legos, that I really don’t want floating around in their sea of toys for the toddlers to get. So I have had a coffee table with drawers on my to do list for well over a year. Enjoy the free woodworking plans! 🙂
***The wood I used is 1″ thick. The pictures are to be used as a guide but the plans are created for standard 3/4″ lumber.
Material you will need for this project:
1 1/4″ finishing nails
glue, lots of glue
(18) 1/4″ x 1″ dowels
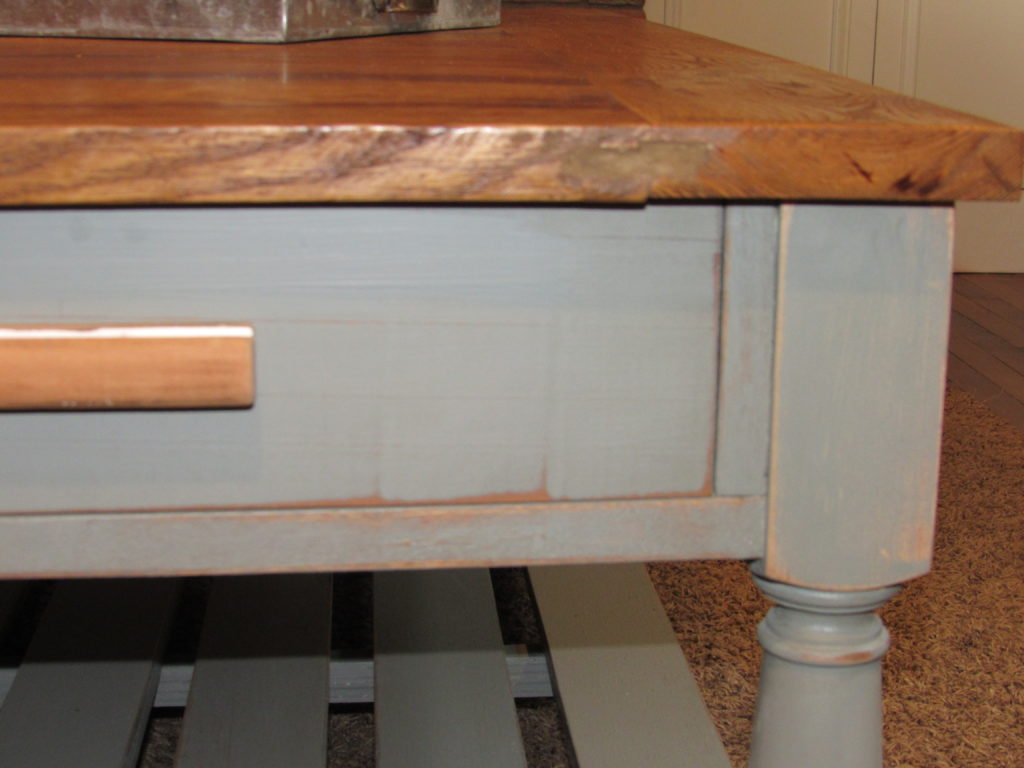
4 legs 2 1/4 x 2 1/4
(4) 1″ wood screes
(4) knobs or pulls
lumber (see list below)
Tools you will need:
Ear Protection
Eye Protection
Table saw
miter saw (optional)
plunge router
1/4″ upspiral bit
square
drill
1/4″ drill bit
(4) 4′ pipe clamps
orbital sander
220 grit sandpaper
hand plane (optional)
Cut list:
(2) 4 3/4 x 36 pine (top side aprons)
(2) 1 1/2 x 3/4 x 36 pine (front and back rails)
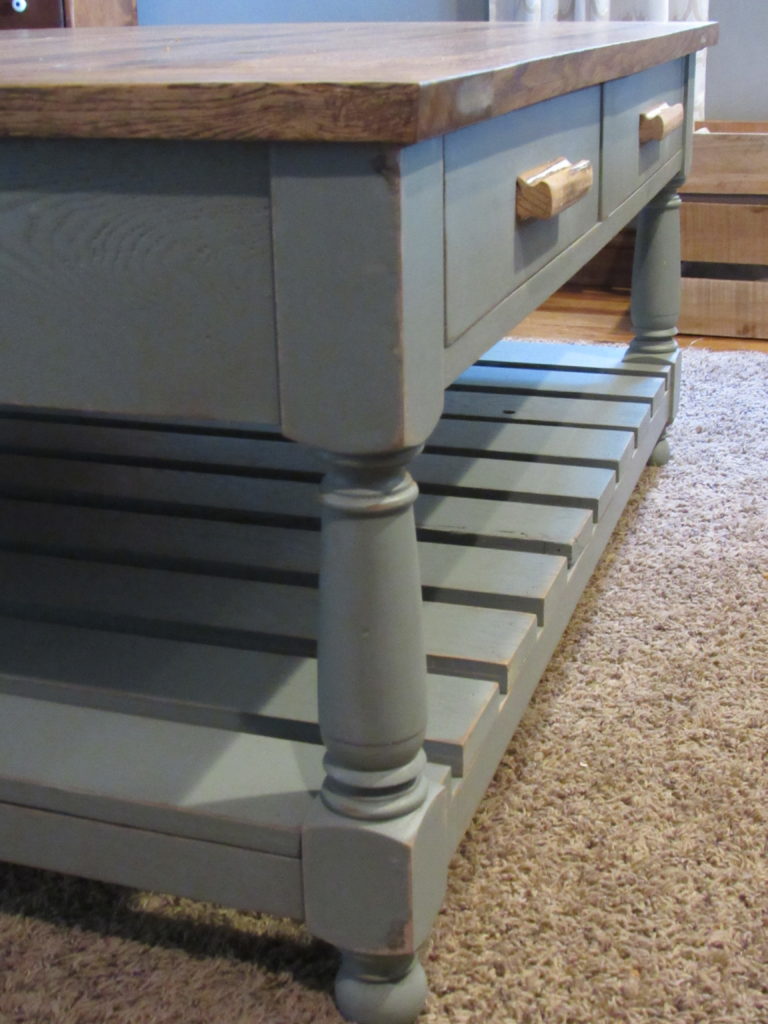
(4) 1 1/2 x 36 pine (bottom stretchers)
(6) 1 1/2 x 4 pine (stiles)
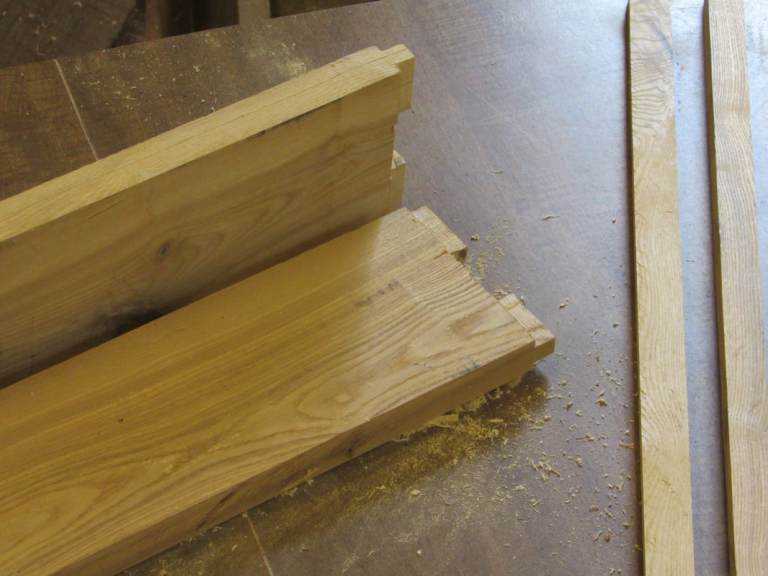
(2) 5 1/2 x 42 oak (top breadboards)
(8) 5 1/4 x 33 oak (top)
(10) 39ish x 3 1/2 pine — wait to cut — (bottom shelf)
(2) 4 3/4 x 37 1/2 x 3/4 plywood (support for drawer guides)
(4) 1 1/2 x 2′ pine (drawer guides)
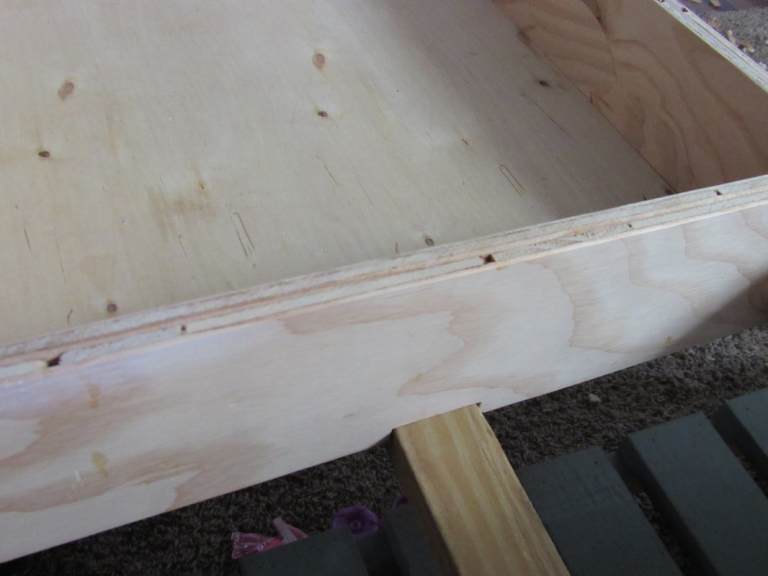
(8) 3 3/4 x 15 3/4 x 3/4 plywood (drawers)
(4) 3 3/4 x ??? around 15 3/4 x 3/4 plywood (drawer backs)
(4) 4 x ???? around 16 pine (drawer fronts)
(4) 1 x 1 x 3″ scrap blocks of wood (table top fasteners)
Disclosure: This post includes affiliate links, which means I receive a small commission if you make a purchase through my links. There is no extra cost to you. Purchasing through my affiliate links help support my website so I am able to continue posting free content.
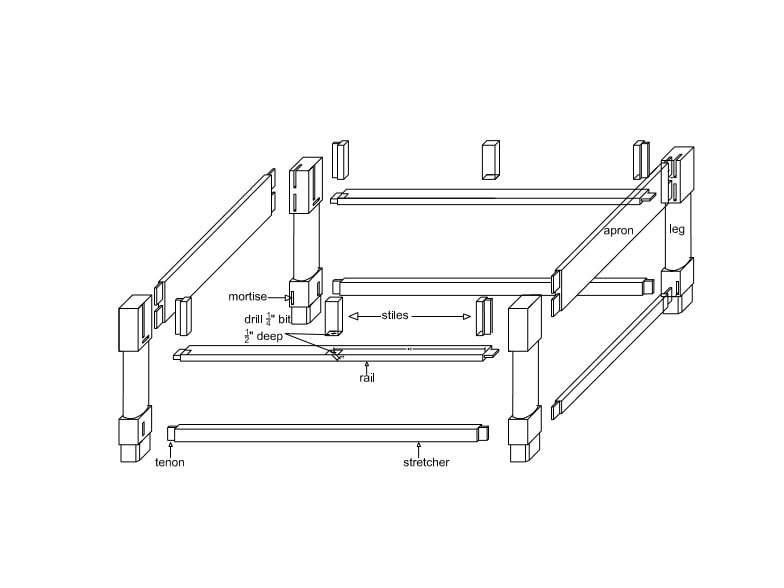
Carcass
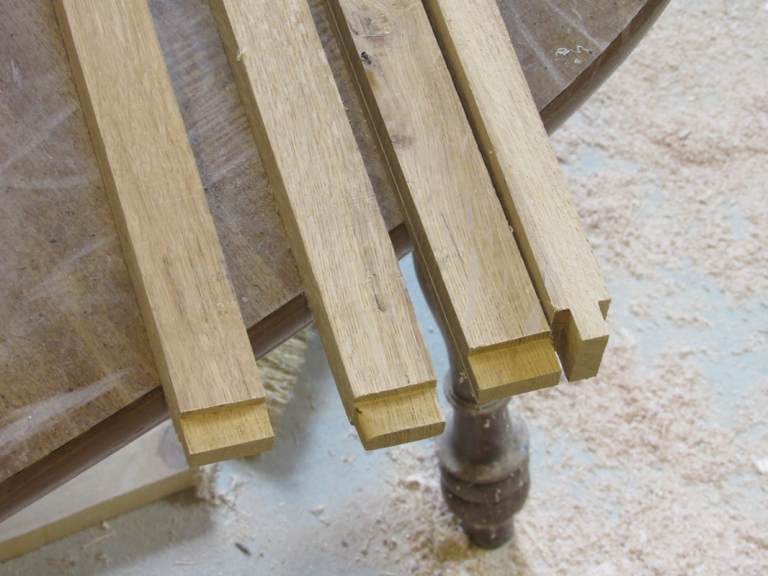
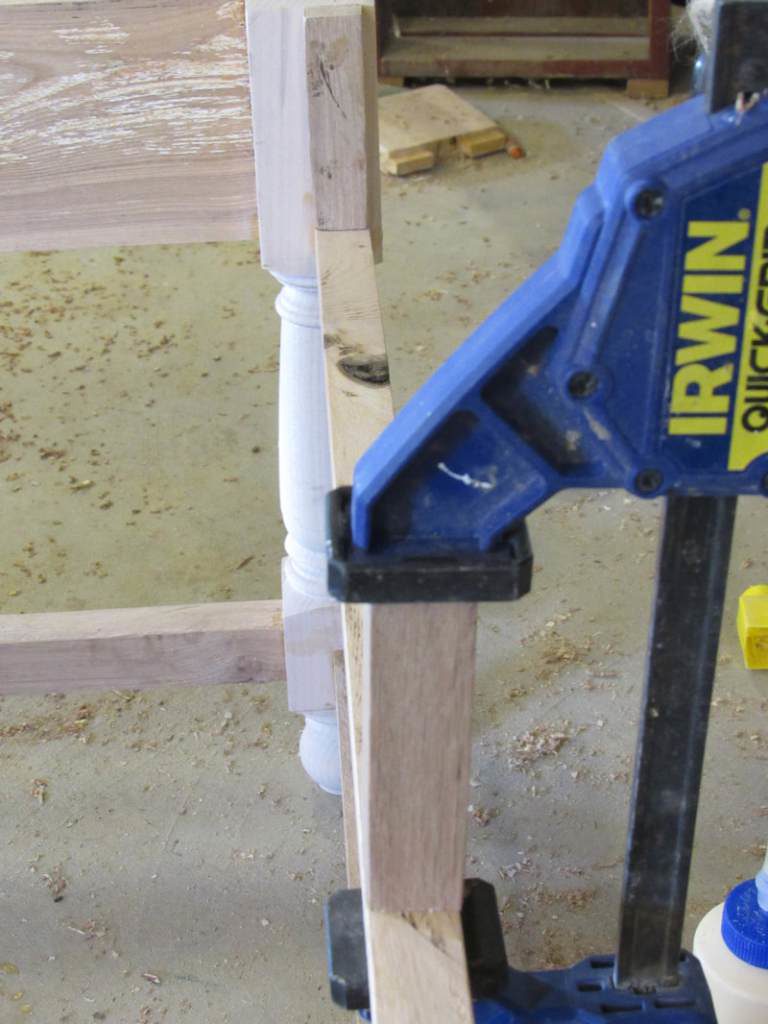
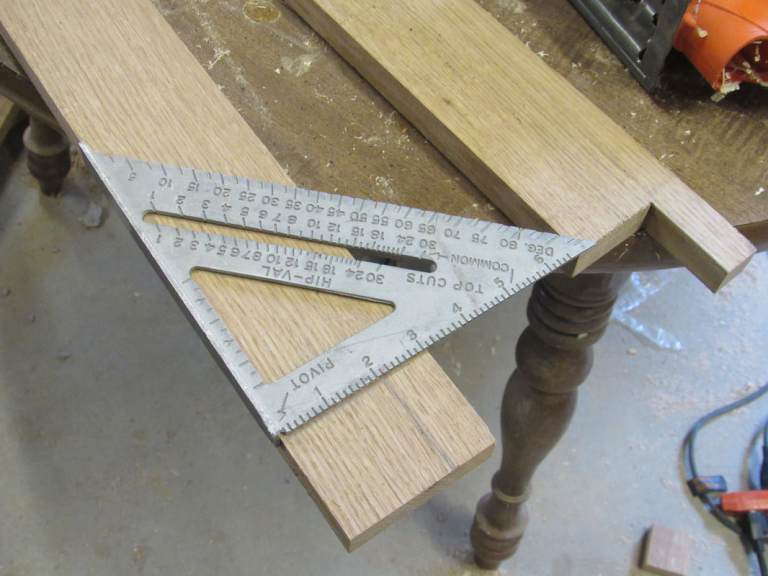
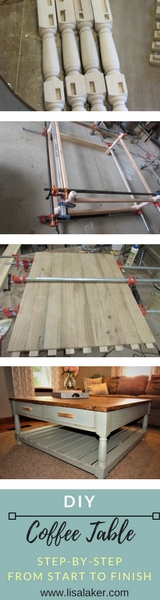
1. Cut all your apron, front rails, and stretcher pieces to length and make the tenons on each end. See how here.

2. Transfer your tenon measurements to your legs 1/2″ from the front. Router mortises into legs. Be careful that you cut them all on the correct side. Set them up to double check all of your marks.
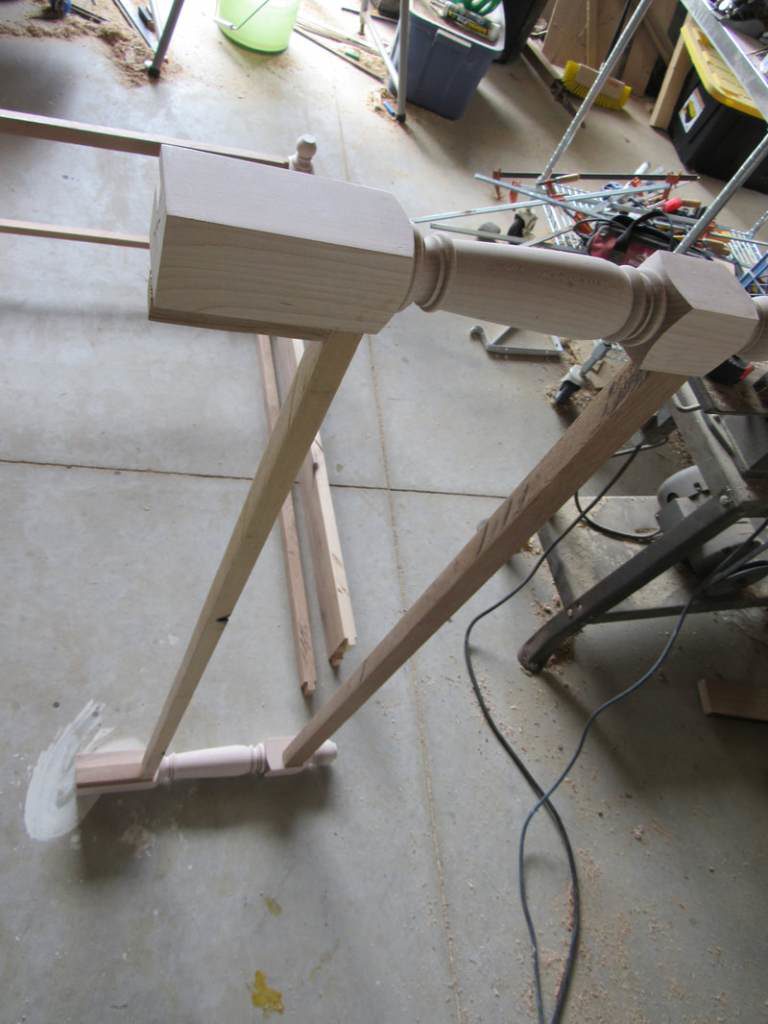
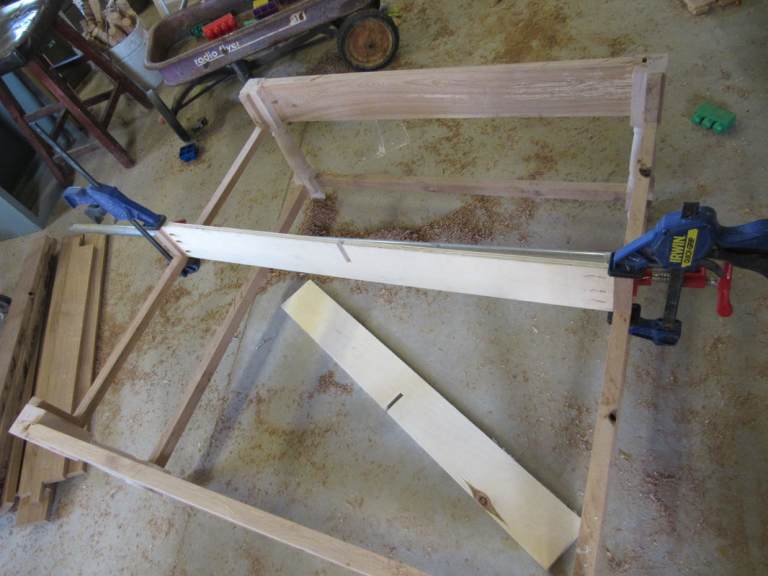
3. Dry fit the table carcass together. Make any necessary adjustments.
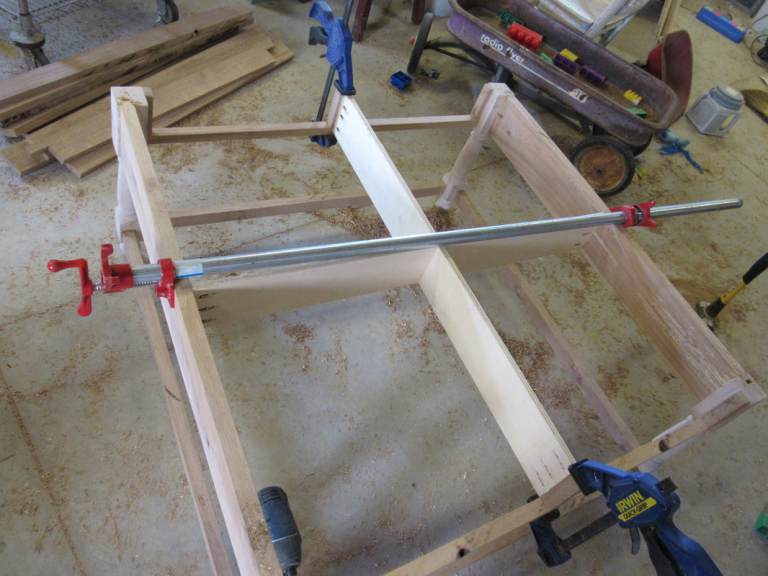
4. Glue and clamp the side aprons and side stretchers into the legs. Clamp with pipe clamp at top apron and bottom. Allow to dry.
5. Join both sets with front stretchers and rails. Clamp with pipe clamps at top and bottom. Be sure your table is square. Allow to dry.
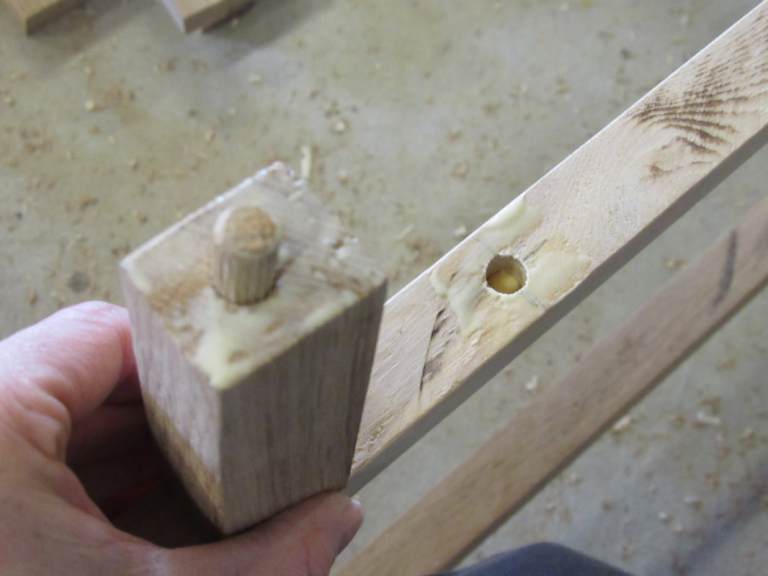
6. Mark the center on the bottom of both center stiles and drill with 1/4″ drill bit 1/2″ deep into the wood. Mark the center of the width of the front and back rails. Place a mark 3/8″ from the front over the center line. Check to be sure that the mark will line up with the hole drilled in the bottom of your center stile. Drill a hole with a 1/4″ drill bit 1/2″ into the wood. To be sure you are only drilling 1/2″, use a marker to mark 1/2 high on your drill bit.
Add glue to the bottom of the center stile, insert the dowel pin and clamp. The front of your center stile should be flush with the front of the rail. Also glue in the end stiles.
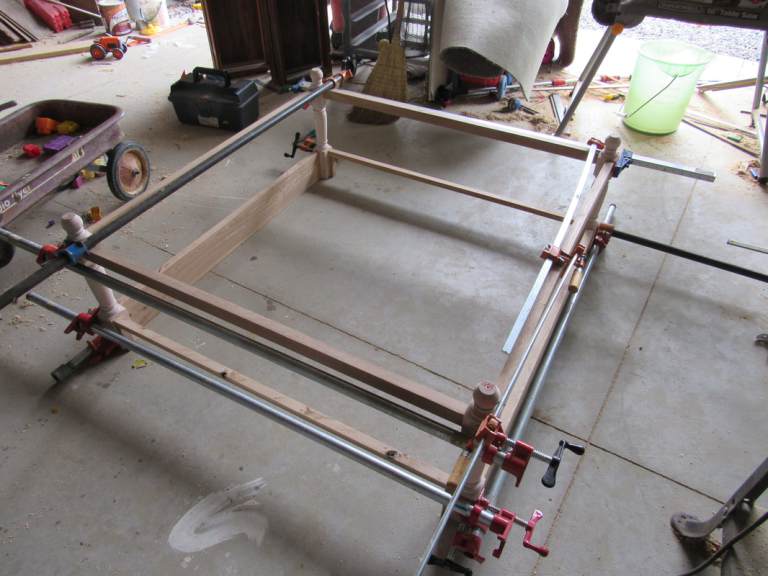
7. Cut 3/4″ wide notch in the center of both plywood pieces. Fit the pieces into the center top of the table. Clamp tight and use pocket screws to fasten them in place.
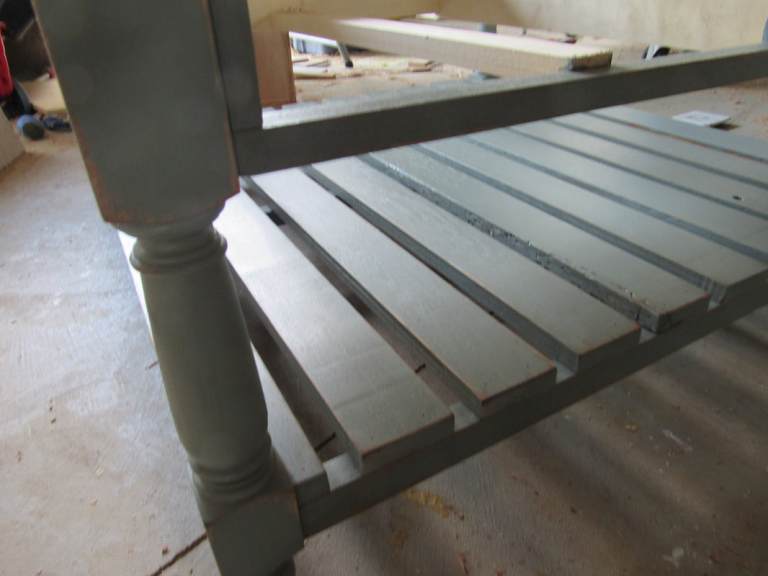
8. Measure and cut all bottom shelf pieces to length.
9. Notch end shelf pieces around legs with aprons.
10. Sand all shelf pieces and the table carcass with 220 grit paper and paint or stain. See what I did here.
11. Set edge pieces and nail.
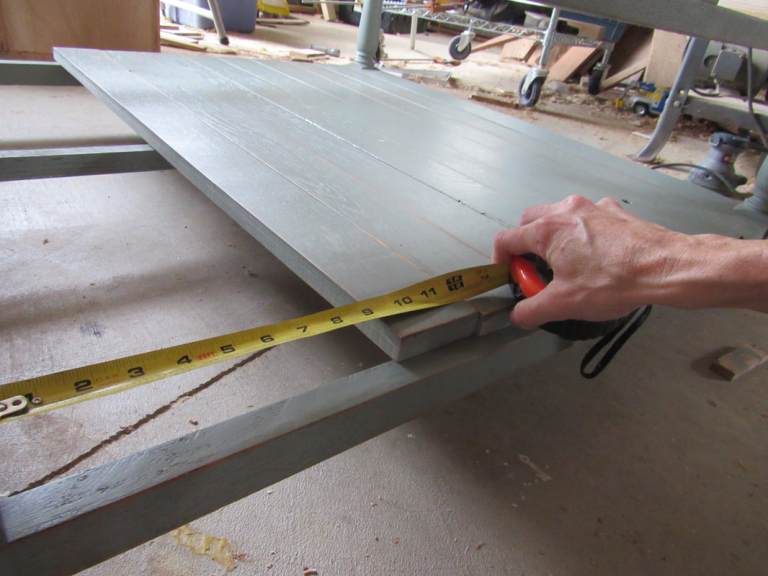
12. Slide all other shelf pieces to one side and measure the gap. Divide the gap by 9. That’s the amount of space needed in between each slat.
13. Measure and put one nail in each board. Before you nail, make sure that the other end is in the vicinity that it should be. By only using one nail at first, you can easily move the other side into place.
14. Go to other side and set boards in place. Put 2 nails in and add the the second nail to the first side.
15. Build the drawers. See how here.
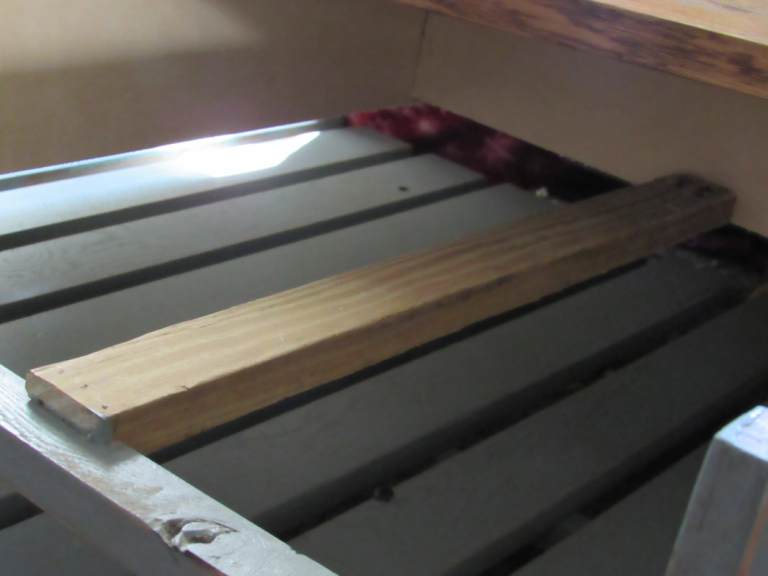
16. Measure the length between the rail and the plywood and add 3/4″. Notch the guide around the front rail to sit flushly under the drawer. Make sure the drawer is sitting straight and mark the top and edges of the guide placement onto the plywood. Remove drawer. Screw guide into place and nail in the front notch.
17. Build top. See how here.
18. Fasten 2 blocks of wood on both sides near the front and back. Wood expands and contracts across the grain so decide which way you are going to place your top. Drill holes through the blocks for the screws but not the screw head. Widen the holes in the direction of the wood expansion
19. Place the top on and center it. Drive 1″ wood screws into your mounting blocks and into your table top careful not to drive them too far.
20. Finally, insert drawers and enjoy your beautiful piece!
Pin me!
If you enjoyed this, check out these projects too!